The Thermomix isn't a cheap piece of kitchen equipment, but it certainly saves money in the long run. Recipes that have a lot of chopping up, stirring or are tricky can be easily made in the Thermomix.
Today I've made both Whole Egg Mayonnaise and Tasty Fruit Chutney. This lead me to think about all the things I no longer buy in the supermarket.
So, I've decide to list these:
Mayonnnaise
Coleslaw Dressing
Salad Cream
Chutney
Tomato Relish
Jams
Peanut Paste
Packaged Sauces
Bottled Pasta Sauces
Packet Spice or Coating Mixes eg. Pepper Steak Spice, Fried Chicken Coating
Curry Pastes
Biscuits & Cakes
Toasted Muesli
Less Bread
Washing Powder
Self Raising Flour
Salad Dressings
Muesli Bars
Canned Soup
Castor Sugar - I only buy Raw Organic Sugar (grind into castor in TMX) and Icing Sugar
I'm sure I'll think of some more things to add to my list, but that's a fairly substantial list of products that can be quite expensive. I rarely bought cakes before anyway, but at times I'd have to buy a fruit cake for the lunch box. Now, I make large cakes and freeze half.
Things in red are those I've added later as I think of them or use them!
Due to my home business, Skinflint, I also don't buy the following personal care and skin care items:
Soap
Moisturiser
Cleanser
Scrub
Toner
Lip Balm
Anti-Wrinkle Cream
Body Buter
Hand Cream
I also make for myself:
Dishwashing Liquid
Hand Cleanser
So, although I beat myself up about my dreadful garden and my not-very-clean house and occasionally unmade bed and untidy bedroom, I feel very virtuous about the savings that I make because I produce so much of what I use.
Friday, November 19, 2010
Monday, September 27, 2010
Packaged Lettuce, Spinach etc (rant)

That's it! I'm not buying spinach or lettuce in one of those damn clamshell plastic containers ever again!
Aside from the fact that the containers are so environmentally unfriendly, the leaves are squished in so tightly they're all mangled and bruised when I go to use them. This is the eleventeenth container of leaves that I've had to throw away and I'm ANGRY! Beautiful Baby Spinach that I was planning to use in my salad tonight and it's all in the bin, slimy and disgusting, purchased only on Friday.
I really wish that all supermarkets would have the leaves loose so you can just pick out what you want, put in in a plastic bag and know that the leaves will keep well in the fridge. IGA in Busselton does and most Coles supermarkets do too, but not Woolies.
Well, that's it for my rant.
Update!
Woolies in Katanning now have loose salad leaves. At about $15 per kilo, they're great value when you don't have any leaves in your garden.
I don't need them now, as my vegie garden is looking wonderful.
Wednesday, September 22, 2010
Delicious Thermomix Chocolate Cake
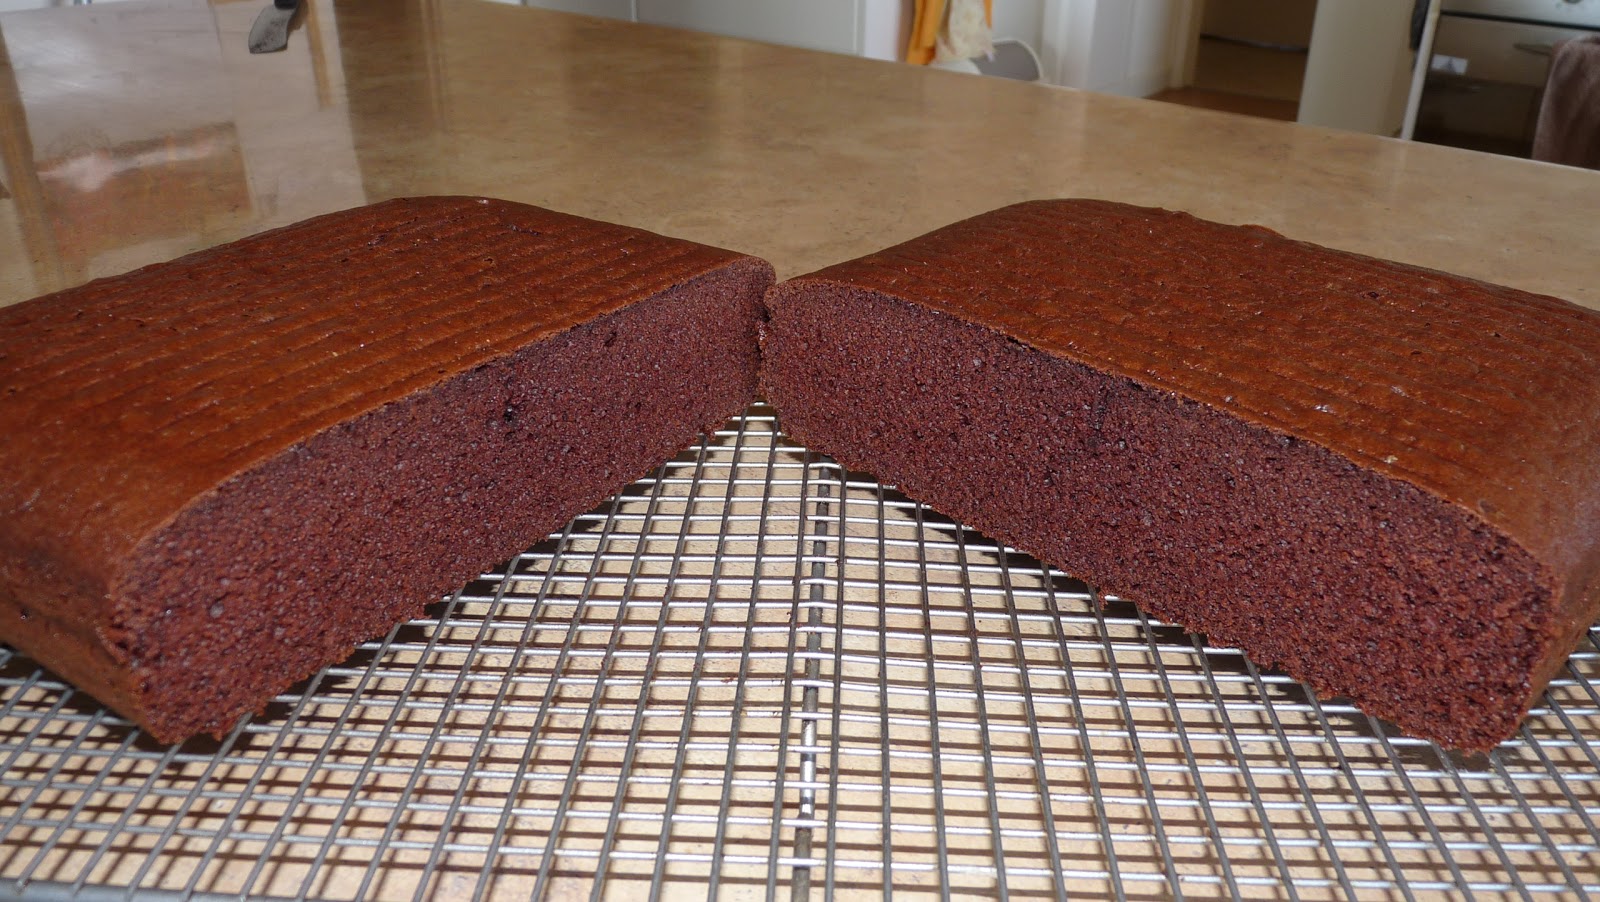
This recipe has been adapted from one on the Thermomix Forum. It's such a great recipe and so many members have had success with it. Most use it as a base for birthday cakes because it's made in a slab tin.
I've reduced the original sugar content, used less eggs and also make it using the traditional cake making method.
It can easily be made in a Food Processor.
Chocolate Cake
170g butter (I use Dairy Soft for a softer cake texture)
260g sugar (process first if using coarse or raw sugar)
1 tsp vanilla
3 eggs
300g plain flour
2 tsp baking powder
1 tsp bi-carb
40g cocoa - use the darkest you can find, Woolworths Home Brand is the best, believe it or not...
250g milk
Grease and line a small baking dish. I use the Scanpan one which is 21cm x 29cm.
Preheat oven to 160c fan forced.
Process butter and sugar at speed 5 - 6 for about 30 seconds or until creamy. Add eggs, one at a time. When adding the last egg, add some of the flour and cocoa mix.
Add the rest of the dry ingredients and the milk and process on speed 5 for a few seconds, using the spatula to assist. Scrape down and process again until all incorporated.
Bake for 40 minutes. Leave in tin for 5 to 10 minutes before turning out.
This also makes great muffins. Oven needs to be only a little hotter, around 170C. Bake for 20 -25 minutes.
Makes around 20, depending on size.
Buttercream Icing
125 g butter (real butter, not a dairy mix)
180g pure icing sugar
2 Tbsp cream or milk
2 Tbsp cocoa
1 Tbsp Glucose
2 tsp vanilla
Whizz all together for about 20 seconds. Scrape down and whizz again - about speed 5 or 6.
Tuesday, August 10, 2010
Favourite Cookware
 |
| Le Creuset |
I'm a fan of really good quality bake ware and cookware. I use my Thermomix a lot, but when cooking larger quantities or things that the Thermomix isn't suitable for, I love my Le Crueset cookware. I only have two items that I purchased online and I use these over and over again.
I love the fact that I can brown meat in the pans and get a really dark caramelisation. The dishes will go on the stove top or in the oven and can cook like a slow cooker. They wash up like a dream, absolutely spotless!
Le Creuset cook ware is an investment, it isn't cheap. It's sometimes available at a special price, but usually only limited colours. I really don't care about colour. I bought the red ones as only blue and red were available.
They're also very heavy, being enamelled cast iron, so not suitable for people who have arthritis or other conditions which would affect their ability to heft a full casserole from the oven.
I used to be a fan of Scanpan, but now only use their baking dishes. I bought the Scanpan frying pan and wok when they first came to Australia and was disappointed as they certainly were not 'non-stick'. The baking dishes, however, are exceptional. Definitely non stick and easy to clean.
You certainly don't need great quality cookware to be a good cook, but it does help. My eldest sister is an exceptional cook and has always had cheap saucepans and kitchenware. I honestly don't know how she's managed to produce the sort of food she has with only the most basic of equipment. It can be done, but I'd rather not have to.
Tuesday, August 3, 2010
Ice Cream Containers
What is it with the manufacturers of ice cream lately? Where have our normal ice cream containers gone?
I asked these questions of my local store owner and was very cross to find that Peters have sold out to Multinational giant, Nestle. How could they do that? I loathe multinationals and try to avoid buying these brands as much as possible.
Nestle, in their weird sort of wisdom, chose to make these strange little tubs with lids that are almost impossible to remove. I fight with the damn things every time my nearest and dearest wants to have ice cream with his dessert (sacrilege). My wonderful local store owner agreed that we should be using local products, so he now buys Bulla ice cream. But, low and behold, they also have the horrible containers with the impossible lids!
These containers may fit into the freezer a bit better, but you can't re-use them. In a world where we're being encouraged to "Reduce, Re-use and Recycle", why have companies taken away the good old ice cream container?
Sunday, August 1, 2010
Perfect Patty Cakes
My family seem to love patty cakes. They're easy to eat, especially since they can be just grabbed, even with hands covered in grease, and quickly devoured.
I still go by the name "Patty Cakes", the Australian name, not "Cup Cakes", an Americanisation that is creeping in to our vocabulary.
My no fail recipe is a beauty, because it was originally a food processor recipe, so is perfect for the Thermomix.
I use paper patty pans, available from supermarkets and specialty stores.
Perfect Patty Cakes
240g plain flour
2 tsp baking powder
220g butter, softened
150g castor sugar
2 tsp vanilla
4 eggs
Place butter, vanilla and sugar into the Thermomix bowl and mix on speed 4/3 minutes, scraping down frequently.
Add eggs one at a time on speed 4 and mix for around 30 seconds each. Scrape down in between. Mixture will curdle due to the ratio of egg to butter.
Add sifted flour and mix on dough setting/30 seconds or until incorporated. Use spatula to assist.
Use ice cream scoop to half fill patty pans and bake at 180 degrees C for about 15 minutes.
Recipe makes around 16.
Ice with buttercream icing. The following recipe makes heaps of icing, but it keeps in the fridge for a few weeks. It's adapted from a recipe by Serious Cakes and is fabulous for piping.
I haven't tried this is in the Thermomix yet, but it would be excellent as sometimes the mixer can put unwanted air bubbles in the icing.
Buttercream Icing/Filling
300g salted butter, softened
145g Copha, softened (or other vegetable shortening)
5 Tbsp Cream
2 tsp vanilla
780g pure icing sugar
3 Tbsp glucose
Soften copha over hot water, stirring regularly until smooth and creamy. Add to softened butter and mix with electric mixer until creamy and lighter in colour. Add vanilla. Slowly add icing sugar and continue mixing for about a minute. Add glucose and, depending on the weather, the amount of cream necessary to achieve a good consistency. For piping and in warmer weather, 2 tablespoons may be sufficient.
Add more cream if using as a filling.
Do not refrigerate iced cakes.
I've adjusted this recipe by using less sugar.
Sunday, July 25, 2010
My Blog Personality
Just for fun, I used Typealyzer to analyse my blog's 'personality'.
It's fairly accurate, I think:
 The entertaining and friendly type. They are especially attuned to pleasure and beauty and like to fill their surroundings with soft fabrics, bright colors and sweet smells. They live in the present moment and don´t like to plan ahead - they are always in risk of exhausting themselves.
The enjoy work that makes them able to help other people in a concrete and visible way. They tend to avoid conflicts and rarely initiate confrontation - qualities that can make it hard for them in management positions.
Yep, I think that's me....
It's fairly accurate, I think:
The entertaining and friendly type. They are especially attuned to pleasure and beauty and like to fill their surroundings with soft fabrics, bright colors and sweet smells. They live in the present moment and don´t like to plan ahead - they are always in risk of exhausting themselves.The enjoy work that makes them able to help other people in a concrete and visible way. They tend to avoid conflicts and rarely initiate confrontation - qualities that can make it hard for them in management positions.
Yep, I think that's me....
Quick Tuna Risotto
It seems whenever I have a big breakfast, I'm hungry again around lunchtime.
Today was no execption. Bacon, eggs, tomato and spaghetti for breakfast on a slice of gorgeous homemade bread at 9am (yes, we had a lie-in today), then hungry at 1 o'clock!
I've been in the kitchen most of the morning, baking more patty cakes and a carrot cake. I knew ol' Herman would be able to whip up a super quick risotto, so looked around for inspiration and spied a tin of tuna in spring water in the pantry. This recipe is enough for two people (or one greedy person!).
Tuna & Spinach Risotto
1 small onion, quartered
20g oil
1/2 cup arborio rice
1/2 cup white wine
1/2 cup tuna juice
small tin of tuna in spring water
zest and juice of 1 lemon (make up to 1/2 cup with water)
handful of spinach leaves (mine were from the garden)
parsley
1/2 punnet or so of cherry tomatoes
Grate the lemon rind with the parsley leaves for a second or two and set aside. I don't do this myself, as I have a whizz bang zester and I just use scissors to chop the parsley into the bowl.
Turn Thermomix on to speed 5 and drop onion on to blades, (cover with hand quickly) for a couple of seconds. Scrape down and blitz at speed 4 for a second or two if necessary. Scrape down again.
Add oil and heat at Varoma for 2 minutes/speed 1. Add rice and cook at same temperature for a couple of minutes.
Add wine, water and tuna juice and cook for 10 minutes/100/speed 2, reverse. Add lemon juice and rind and cook for a further 5 - 10 minutes or until rice is almost cooked. Add spinach leaves, tuna, chopped parsley and tomato and cook for 2 minutes/ reverse/speed 1 - 2. Use Thermomix spatula to help incorporate spinach.
You could add parmesan cheese, but I was so hungry, I just poured it into my bowl and scoffed it. Lemon pepper woud also be a nice addition. It doesn't need extra salt as the tuna is salty enough.
Sorry, no photo - too hungry!
Saturday, July 24, 2010
Serious Cakes

I've been watching some videos of a very clever lady, known as SeriousCakes in the US about decorating with Buttercream Icing. She does some amazing things, albeit a little over the top - garish colours and enough buttercream to drown a cat.
Her videos are very entertaining with little snippets to read and beautiful music to listen to while you watch.
I thought I'd try one of her cake recipes, she calls it yellow cake. I converted the recipe using an online conversion tool and thought it sounded a little out of whack:
2 3/4 cups all purpose flour (250g plain flour)
3 tsp baking powder
1 tsp salt
1 cup shortening (220g)
2 cups sugar (385g)
4 large eggs
3 tsp vanilla
1 3/4 cups milk (385g)
The closest thing I could find to vegetable shortening (they use the brand name Crisco), was Copha, which is coconut shortening. I used one third butter and two thirds copha. I couldn't bring myself to use 2 cups sugar, so I reduced to 1.5 cups, or 190g. As I was adding the milk, I knew it was way too much as the mixture was curdling, so I reduced it to the 300g. The mixture was still curdled, so I added another cup of flour, around 150g.
So, that made it a whole new recipe! The mixure still looked a little like it was curdled and the taste wasn't flash because I hadn't added any salt.
The warm cake tasted delicious, light and fluffy, though slightly 'eggy'. However, once cold, the cakes were firm and quite fatty tasting. I played around and made SeriousCakes Buttercream with Copha and butter and decorated them with little stars. I'm taking them up to Footy for afternoon tea. They looked really amatuerish, but the little girls will love them!
Wednesday, June 2, 2010
Smartie Biscuits

These bickies are a huge hit in our family. Crisp and buttery with a delicious crunch of Smarties (or M & M's) make them very morish!
Since a bag of Smarties won't escape chocolate eagle eyes in our house, I often use Blackwood Lane Rainbow Choc Chips, available from supermarkets.
I make these in my Thermomix, but they are easily made in a regular mixer, though you'll need use softened butter and fold in the flours at the end.
Smartie Biscuits
Makes around 50 bickies
250g butter, diced
100g brown sugar
100g caster sugar
2 eggs
2 tsp vanilla
2 1/2 cups plain flour (I use 1 cup spelt and 1 1/2 cups plain)
1/4 cup SR flour
1 tsp bi-carb soda
Preheat oven to 180C and line two large baking trays with baking paper.
Measure cubed butter into Thermomix bowl. Soften for 30 seconds on speed 2 at 37C.
Add sugars and vanilla. Blend on speed 4 for about 2 minutes until creamy.
Add room temperature eggs (I place eggs from the fridge into a bowl of hot water for about 30 seconds) and beat on speed 4 for 2 more minutes.
Sift in the flours and bi-carb and mix on dough setting for around 40 seconds, scraping down occasionally.
Place in a bowl in the fridge for at least an hour.
Roll flat dessertspoonfuls of mixture into balls and place on baking tray. Press down gently and place Smarties or Rainbow Chips onto flattened dough. Press in lightly.

Bake at 180C for around 15 minutes for a chewy biscuit or 20 for a crispy, crunchy biscuit.
Chocolate Muffins
These delicious morsels aren't so much muffins as patty cakes, but the method is more like a muffin. They are easily made in the Thermomix and can also be made in a bowl.
I find that Woolworths Home Brand Cocoa is absolutely divine for these. It's rich and dark, unlike Cadbury's bland offering.
Chocolate Muffins
Makes about 10
Preheat oven to 180 C and place muffin or patty cake cases into tins.
1/2 cup cocoa powder
1/2 cup boiling water
Mix together in a bowl and allow to cool a little while preparing remainder of the recipe.
60g butter - melted in microwave
60g oil (80ml)
145g caster sugar (2/3 cup)
1 tsp vanilla
Blend on speed 3 - 4 for 30 seconds
3 eggs
Add eggs and blend for a further 30 seconds.
1 cup SR flour
1/4 cup plain flour
Scrape down bowl and add flours and chocolate mixture. Mix on dough setting for 10 seconds or so, scraping down occasionally until all mixture is smooth.
Pour into prepared muffin cases and bake for around 20 minutes or until muffins bounce back when touched lightly.
Cool on wire rack and cut out top, place some Hazelnut Chocolate Spread and a big dollop of cream into muffin, replace top and sprinkle with icing sugar.
Sorry, no photo - they went up to footy for afternoon tea.
Saturday, May 22, 2010
Maggie Beer's Sour Cream Pastry
Pastry making is not my forte. My hands seem to be too hot, or something! So, I was thrilled to find a pastry that worked beautifully for me and could be made easily in my Thermomix.
Sour Cream Pastry
Makes one large quiche or two smaller ones.
(To make a quiche, allow 20 minutes resting time for pastry and another 20 minutes resting time once pastry is in the tin, then a further 1/2 hour or so cooking time)
This is a deliciously short, flaky pastry that's well worth making.
Ingredients:
200g chilled butter in chunks
250g plain flour
Process in . (I actually put my bowl in the fridge for 10 minutes to chill it) for a few seconds until it looks like breadcrumbs.
120g sour cream (1/2 cup)
Add to and process on speed 3-4 for a few seconds until crumbly, but beginning to come together. Tip out on to floured board. Bring together and throw on to counter a couple of times (helps prevent shrinkage!). Wrap in plastic wrap and refrigerate 20 minutes.
Place on to silicon mat. Bash with rolling pin to help with rolling out. Make a large rectangle or circle and place in flan tin. Rest in fridge for another 20 minutes. Bake in a very hot oven (220C) for 5 - 10 minutes until beginning to brown. If you have high sides on quiche tin, cover with foil. Remove from oven and discard foil. Inhibit pastry by placing a tea towel over the top and pressing down.
Pour in desired filling and bake for 25 - 35 minutes, depending on size.
I made a yummy vegetarian quiche with this pastry recently:

Sour Cream Pastry
Makes one large quiche or two smaller ones.
(To make a quiche, allow 20 minutes resting time for pastry and another 20 minutes resting time once pastry is in the tin, then a further 1/2 hour or so cooking time)
This is a deliciously short, flaky pastry that's well worth making.
Ingredients:
200g chilled butter in chunks
250g plain flour
Process in
. (I actually put my bowl in the fridge for 10 minutes to chill it) for a few seconds until it looks like breadcrumbs.120g sour cream (1/2 cup)
Add to
and process on speed 3-4 for a few seconds until crumbly, but beginning to come together. Tip out on to floured board. Bring together and throw on to counter a couple of times (helps prevent shrinkage!). Wrap in plastic wrap and refrigerate 20 minutes.Place on to silicon mat. Bash with rolling pin to help with rolling out. Make a large rectangle or circle and place in flan tin. Rest in fridge for another 20 minutes. Bake in a very hot oven (220C) for 5 - 10 minutes until beginning to brown. If you have high sides on quiche tin, cover with foil. Remove from oven and discard foil. Inhibit pastry by placing a tea towel over the top and pressing down.
Pour in desired filling and bake for 25 - 35 minutes, depending on size.
I made a yummy vegetarian quiche with this pastry recently:

Saturday, May 8, 2010
Making Bread with a Ferment

SPELT/WHEAT BREAD
Bread making is a fascinating subject to someone like me who likes to perfect and conquer any commercial made products. The picture above shows today's loaf which is a blend of wholemeal spelt flour and white wheat flour with linseeds and sesame seeds. It has a sprinkling of oat flour on top.
It's easy to make a loaf of bread, but I want to make a loaf of bread that is healthy, as well as having similar qualities to commercially made bread. That lovely softness and the fine texture of soft wholemeal bread is something I aspire to achieve.
I'm getting there very slowly with additions such as Wonder Fresh and Natural Bread Improver from All About Bread in Greenwood. These products only need to be added in small amounts and contain natural enzymes to help create a softer crumb and better keeping ability. I also use Ascorbic Acid, or Vitamin C powder, as it is a natural preservative for home made bread.
Another tip I've learned from reading online Richard Bertinet's Bread information is to make an extra 300g of dough, then keep that 300g aside and place it in the fridge for up to three days. When making the next loaf, add this ferment to the regular dough. Prior to forming the bread or rolls, remove the 300g extra and place it back in the fridge for the next time you make bread.
I've been using this method for some time now and have been able to reduce the amount of yeast I use by 25%. The bread also develops a better flavour.
This isn't a true ferment as such, because true ferments will have to be refreshed with double its weight in flour and water.What happens though, is that after a while the dough becomes too large and the extra is thrown away. That seems like a waste, so I'll keep using the method I'm using now.
Monday, May 3, 2010
Natural Egg Replacement
Last night, I'd planned to make Salmon Patties for tea with left over fresh salmon that we were given, but had no eggs! I'm lucky that we get beautiful home grown eggs from my daughter's chooks. I save all my scraps for them. But, I'd been doing a lot of cooking lately and used them all.
What to do? Well, google is my friend. I found that you can use a number of things to replace eggs, depending on what you're cooking. The wonderful Pioneer Thinking website provided the following:
2 tbsp cornstarch = 1 egg
2 tbsp arrowroot flour = 1 egg
2 tbsp potato starch = 1 egg
1 heaping tbsp soy powder + 2 tbsp water = 1 egg
1 tbsp soy milk powder + 1 tbsp cornstarch + 2 tbsp water = 1 egg.
1 banana = 1 egg in cakes.
1 tbsp milled flax seed and 3 tbsp water = 1 egg. Light, fluffy cakes!
I had made a flax seed gel once before when trying to make a natural hair gel. I remember heating up flax seeds in a pot of water and getting this amazing gel, so I did the same again.
Place 1 tbsp flax seeds and six tbsp water in a small saucepan. Let it simmer on low heat until a gel is formed. Strain, cool and use.
Has anyone else tried other egg substitutes? If so, did they work? Please leave your comments.
I used about 1 1/2 tbsp of the gel and my salmon patties were perfect!
Tuesday, April 27, 2010
The Edible Garden
There's no way you can ever say that I'm a gardener. I pull out weeds sometimes and plant things sometimes, but often forget to water them.
 The exception to that comment is my vegetable garden. I absolutely love being able to go out and collect herbs and vegetables to be used in my cooking.
I've been picking the last of the summer vegies and getting the garden ready for winter vegies in between caring for Rambo, the Wonder Dog after his brush with death.
Green Capsicums, Spinach, Basil, Oregano and Lebanese Eggplant have featured strongly in our menus recently.
Tomatoes were unsuccessful this year, all leaf and very little fruit. I didn't prepare the vegie patch properly and it certainly showed with yellow spotted tomatoes and a baby watermelon that struggled to survive as it's poor roots battled their way through heavy clay.
But, thanks to a couple of birthday Bunnings Vouchers, my vegie patch is having a wonderful treat with loads of mushroom compost, sulphate of potash and a new liquid fertiliser I found.
Sabrina Hahn was discussing a fertiliser on one of her Saturday morning radio shows. The person who developed it was talking about how our WA soils are so deplete of minerals and nutrients and she did a huge amount of research to develop a liquid fertiliser that was not only effective, but safe for river systems (not that there's any run-off into rivers here!), so I searched for something that appeared to be this fertiliser. I think I have the right one - they can't say brand names on the ABC!
I bought a heap of seedlings to plant and now have in my vegie patch and in my garden near the back door:
Asparagus (new, two and three years old)
Bay
Blackberry Bush
Broccolini
Capsicum, still going
Cauliflower
Dill
Fennel
Gai Laan (A Chinese Vegie)
Lebanese Eggplant
Lemongrass
Lemon Thyme
Mint
Mizuna (Salad Leaves)
Oregano
Passionfruit, really late, but loads of flowers and fruit
Thyme
Sage
Spinach, still continuing to produce
Spring Onions
Raspberry Bush
Rosemary
Baby Watermelon, still struggling along
If I had my way, all my garden would be an edible one, with just a few landscape features like geraniums and fast growing trees. The trouble is, I'd forget to water it all!
Monday, April 26, 2010
Macadamia ANZAC Biscuits

These are the most delicious ANZAC Bickies ever! Truly Australian due to the Macadamia nuts in them.
Thanks to achookwoman from the Thermomix Forum for this recipe:
Macadamia ANZAC Biscuits
150g macadamias
120g butter
2 Tbsp Golden Syrup [100g]
100g rolled oats
180g plain flour
100g brown sugar
50g desiccated coconut
1 tsp. bicarbonate of soda
3 Tbsp of water
Preheat oven to 160c fan forced.
Chop macadamias in Thermomix for a few seconds, stopping and starting to ensure even chopping. Leave in the bowl.
Place butter and golden syrup in the bowl and heat for 2 minutes at 60c on speed 2.
Add remainder of the ingredients and process on the knead setting for 20 seconds or so until mixed.
Roll dessert spoonfuls into balls and place on lined baking tray. Flatten with wet fingers. For nice round edges that won't break off, place a cookie cutter around each bickie and circle around the edges.
Bake for 15 minutes (soft biscuits) or 20 minutes (crispy biscuits).
Remove from oven and cool on tray for minute or so, then transfer to wire rack to cool completely.
Thursday, April 22, 2010
Thermomix Sponge Cake

Yes! You can make a sponge cake in the Thermomix. The recipe is one I normally make in my beloved Kitchen Aid. It has never failed for me, even once when I left out one of the raising agents.
When whipping eggs or egg whites in the Thermomix, it's advisable to use a little heat. I whip eggs on 37, but you can even go to 60C.
No Fail Thermomix Sponge
4 large eggs
100g castor sugar (or blitz your sugar in the Thermomix first)
100g wheaten cornflour (also known as wheat starch)
70g custard powder
1 tsp plain flour
1 tsp cream of tartar
1/2 tsp bi-carb soda
Preheat oven to 180 degrees C. Line two 20cm deep sided tins with baking paper. Grease the sides lightly and sprinkle with little cornflour.
Place butterfly into Thermomix bowl.
Add eggs and beat on 37C for 8 minutes on speed 4.
While this is beating, sift flour onto baking paper twice.
Scrape down lid.
Add sugar and beat on speed 4 for 3 minutes.
Remove butterfly.
Add flour and mix on speed 1 - 2 for about 20 seconds.
Pour evenly into tins and bake for 25 minutes. Turn cakes out onto wire rack and remove paper.
Carefully turn over. Allow to cool. Pop one in the freezer and eat the other!
Decorate as desired. For this particular sponge, I used home made Plum & Mulberry Jam in the middle, whipped cream and grated chocolate on top.

Sunday, April 11, 2010
Melting Moments

Mmm, just the name conjures up the remembered taste of these delicious little morsels! This recipe comes from a favourite book, 'Family Circle Biscuits Recipes'. Whatever happened to Family Circle magazine? It's disappeared from the shelves, unfortunately.
Melting Moments
180g unsalted butter (I normally don't like unsalted butter in biscuits, but it works in these)
1/2 cup (70g) icing sugar (make in TMX first, if desired)
1 tsp vanilla
1/3 cup (50g) cornflour
1 cup (170g) plain flour
Preheat oven to 180 degrees C. Line a couple of baking trays with baking paper.
Place softened butter, icing sugar and vanilla in TMX and beat on speed 4-5 for about 3 minutes or until light and creamy.
Add sifted flours and mix on speed 2-3 until just combined. Scrape mixture into a piping bag and use a 1 cm star shaped piping nozzle to pipe rosettes of around 4cm in diameter.
Decorate with glace cherries or glace ginger.
Bake for 15 minutes or until lightly golden.
Transfer to a cake rack to cool.
Alternatively, leave out the decoration and sandwich together, when cool, with a flavoured butter cream.
Friday, April 9, 2010
Bean Stew

I've been scouring my recipe books and the net for vegetarian recipes using legumes and pulses to replace the protein component that meat supplies in our diet. It's important to limit our meat intake as it is acid forming and takes a long time to digest unless accompanied by the right enzyme producing vegetables. Plus, meat is horribly expensive!
I wasn't really able to find a recipe that appealed to me, so I made one up instead, adapting a Gordon Ramsay (horrors - can't bear the man!) recipe.
Bean Stew
1 onion, cut into 8ths
2 cloves garlic
3 sprigs oregano
3 sage leaves
1 tsp ground cumin
1 tsp paprika
1 tsp ground coriander
¼ tsp dried chilli flakes, (optional)
1 large carrot, diced
220g chopped vegies (I used baby aubergine, green pepper and a small tin of champignons)
2 bay leaves
400g water
3 tsp vegetable stock
2 tomatoes skinned, roughly chopped
Ground pepper
2 cans 4 Bean Mix
plain yoghurt
Chop onion, garlic and herbs by tipping on to spinning blades of TMX at speed 5. Scrape down and add oil and spices. Cook on 100c for 2 minutes at speed 1.
Add carrots, water, herbs and stock and cook on 100c for 5 minutes, speed 1, reverse. Add chopped tomatoes and vegies and cook on 100c for 15 minutes, speed 2, reverse. Add beans and cook for a further 2 to 3 minutes as before. Add pepper.
Serve with a dollop of yoghurt and fresh chopped parsley. Sprinkle with paprika, if desired.
Thursday, April 8, 2010
Hot Cross Buns

I know that Easter is over for another year, but I had a number of failures trying to make HXB's this year and finally discovered that I didn't read the recipe correctly!!
So, not to be outdone, I tried again. This time with the right amount of yeast...
The recipe I used is from the cookbook that comes with the Thermomix, Everyday Cooking.
I've modified it slightly.
Hot Cross Buns
235g warm water
2 Tbsp. milk powder
4 tsp dried yeast
1 tsp cinnamon
1 tsp ground nutmeg
1/2 tsp bun spice essence (available from All About Bread)
1/2 tsp ground cloves
70g butter
1/2 tsp lemon oil (or essence)
Add the above ingredients to the Thermomix bowl and heat to 90C on speed 1 for 50 seconds.
1 egg
500g bread mix (I used High Fibre White)
1 1/2 tsp Wonder Fresh (All About Bread)
Add the above ingredients to the liquid and knead on the dough setting for 3 minutes.
170g of any dried fruits. (currants and sultanas, dried apricots (chop in TMX first), cranberries, mixed fruit)
Add to dough and mix for about 10 seconds on speed 5. Turn out and knead gently to further incorporate fruit.
Place in a greased bowl and cover with a tea towel. Put in a warm place and allow to rise until doubled in size. This takes about an hour and a half.
Punch down dough and shape into a log. Cut log into three even pieces (I weigh mine).
Cut each piece into four (approx 93g each), making 12 dough balls.

Roll into balls and then press through your thumb and forefinger to make a mushroom shape, twisting the base of the dough ball. Put any exposed fruit to the bottom.
This ensures that the dough is shaped into a smooth ball and the fruit doesn't burn when the buns are cooked.

Place into a small baking dish lined with baking paper. Cover with a damp tea towel and allow to rise for 1/2 an hour or so, until doubled again. 15 minutes before cooking, pre heat oven to 220C.
To place crosses on buns, mix the following together and place in a ziplock bag.
60g plain flour
60g water
1 tsp icing sugar
Squish together until blended.
Cut a small hole in one corner and pipe mixture in lines long ways then cross ways on buns.

Place in oven and bake for 15 minutes or until a nice golden colour.
While they're baking make the sugar syrup:
1 Tbsp water
1 Tbsp sugar
Place in a small saucepan and heat until bubbling and sugar is dissolved.
Brush with hot sugar syrup while warm.

Next time, I'd prove the shaped buns a lot longer to create a softer, lighter bun. Also, oven should only be at about 180 if fan forced as I found these were a bit hard on the bottom.
Thursday, April 1, 2010
Jamie Oliver - not just the Naked Chef...
This video is fairly long, but well worth watching.
Jamie Oliver has taken on the obesity problems of the western world. His philosophy is:
Jamie Oliver has taken on the obesity problems of the western world. His philosophy is:
"I wish for everyone to help create a strong, sustainable movement to educate every child about food, inspire families to cook again, and empower people everywhere to fight obesity."
Jamie Oliver
We all need to take this on board. Teach your children to cook, teach them about fresh food, teach them about the hidden dangers of fast food, cool drinks and processed supermarket foods.
Sunday, March 28, 2010
Pizza Scrolls

They generally have a beer as they've finished the game, so sweet things just don't cut it and I loathe making sandwiches. I have made a million sandwiches for packed lunches over the years, I'm sure.
Yesterday, I made Pizza Scrolls, which went down a treat.
Pizza Scrolls
Makes 30
500g white bread mix (I used All About Bread's HiFibre White)
300g water
1 tsp dried yeast
50g olive oil
2 tsp Italian herbs or a handful of fresh (blend on 6 before adding water)
2 Tbsp grated fresh parmesan cheese
Place all ingredients into Thermomix bowl and knead on dough setting for 2 minutes. Place in a greased bowl in a warm place and cover with a cloth. Leave to rise for half and hour or so. If you don't have a Thermomix, mix ingredients together in a bowl. Turn out on to bench and knead for 5 to 10 minutes.
Meanwhile, prepare the Pizza Sauce:
Pizza Sauce
Makes 2 jars
2 Tbsp olive oil
1 onion, quartered
1 tin tomatoes (440g) or about 6 roma tomatoes
2 Tbsp tomato paste
1 tsp dried Italian herbs or handful of fresh
1 tsp sugar
1 tsp salt
Heat oil on 100 for 1 minute, speed soft. Turn dial to speed 5 and add onions carefully. Place MC cup on immediately and chop for a second or two. Scrape down bowl and cook for 3 minutes on Varoma temperature.
Add all other ingredients and blend on speed 5 for 5 seconds.
Cook on 100 for 20 minutes. Blend again if necessary. Cool before using.
If you don't have a Thermomix, sauté chopped onion in a pan and add other ingredients. Cook for 20 minutes or so. When cool, place in a food processor or blender.
To put together:
Cut dough in half and roll out one at a time into a rectangle shape. To prevent dough from shrinking back when rolling, roll out on a shiny surface which the dough will stick to. Glass cutting boards are good. I happen to have a polished laminex bench top which is perfect.Trim edges of rectangle.
Top with sauce and finely diced toppings such as cabanossi, pineapple, capsicum, mushrooms etc. - no more than three toppings.
Roll up long ends.

When ready to bake, cut 1 cm slices from roll, place on lined baking tray and re-shape into circles.

Cover with a blend of parmesan, mozzarella and tasty cheese and bake for 10 to 15 minutes or until lightly browned.
Delicious hot or cold.
Friday, March 26, 2010
Lime Coconut Panna Cotta
This is a delicious dessert which is perfect served after a big Indian Feast.
My guests last night said it was light and refreshing without being too rich or creamy. It can be made the day before, but is best made the morning before the evening meal.
If you don't have a Thermomix, simply make it on the stove and do a bit of stirring. When adding lime juice, stir vigorously so it doesn't split.
I forgot to take a photo, so will have to make this one again for the photo opportunity...
Lime Coconut Panna Cotta
Serves 6
2 tsp powdered gelatine or 4 gelatine leaves
6 Kaffir Lime Leaves
thinly peeled rind of 1 lime
40g sugar
150g light evaporated milk or single cream
350g coconut cream (Light is fine)
25g of lime juice (about 1 or 2 limes)
Soak gelatine leaves in cold water (for powdered gelatine, sponge in a little cold water). Mill sugar and then place kaffir lime leaves, lime rind, evaporated milk (or cream) and coconut cream in TM and heat to 70° for 5 minutes, speed spoon. Leave to infuse for another 5 minutes.
Strain to remove leaves and rind.
Bring to boil, approx 4 minutes at 90° on speed 3. Squeeze out gelatine leaves and stir in for about 10 seconds on speed 3. Add lime juice and stir 5 seconds on speed 2
Pour into greased moulds or into cocktail glasses and refrigerate.
To serve, turn out of moulds and spoon generous amounts mango coulis around one side and berry coulis around the other. Use a skewer to draw strands of each sauce into the other. Add some sliced kiwi fruit for decoration.
For cocktail glasses, do the same, pouring sauces each side on top of panna cotta.
Notes:
- It doesn’t matter what ratio of coconut cream to evaporated milk you use, as long as the amount of liquid is 500g.
- Coconut Milk can be used instead of cream.
- If you don’t have enough coconut cream, add a little coconut essence to the mixture.
Tuesday, March 9, 2010
Boeuf avec l'orange
It may have something to do with the fact that I recently watched Julie/Julia and have just read the book as well that the desire for some Frenchiness has slipped into my cooking.
My mum, the queen of home cooking, in my eyes, had a French background and I've always loved the language as well as the food.
Normally, I'm not one to use a recipe when I make a stew, but today I wanted a particular flavour, orange and red wine in my beef casserole. Deciding to cook it very slowly in the oven, it definitely called for serious contemplation. None of the recipes I looked at were quite what I wanted, so I did my own thing, and here it is:
Boeuf avec l'orange
1 - 1.5 kg beef, large dice (mine was already diced, supermarket stuff, and a bit too small)
1/2 cup or so of olive oil (yes, it's a lot, but there's no fat left on the meat, and you need it to keep the meat moist)
salt and pepper
Coat beef in the oil and add salt and pepper. Be generous with the seasoning as there is no other seasoning in the dish.
Heat a large non stick frying pan until very hot. Put small amounts of meat into pan and let brown on one side. Toss around for a minute or so and place oven-proof casserole. (I use a Scanpan Dutch Oven). Repeat with remaining meat in small batches until all meat is browned.

1.5 cups red wine
1 cup water
Juice and rind of one orange
Take the pan off the heat and deglaze with red wine. Add water, rind and juice and cook down until reduced by half. Pour over the meat.
2 onions, sliced
2 bay leaves
2 sage leaves
Put onions over the top of the meat with the herbs.
2 heaped Tbsp Tomato Paste
2 heaped Tbsp plain flour
Mix together and smoosh over the onions, then stir in (so no lumps form).
Cook in a slow oven, 150 degrees C for two and a half hours. Check for tenderness of meat. Some meat may need another half hour or so.

I would much rather use gravy beef for this, but stewing steak was all I had in the freezer. Pan frying the meat prior to cooking slowly really adds colour and delicious flavour to any meat. It's definitely worth the mess and the smoke! I just open all the doors and windows.
I didn't take a photo of my dinner plate, but the stew was a wonderful rich colour and the taste was superb. I'll make pies with the remaining stew.
Don't you just love the French language? Beef Stew with Orange doesn't sound nearly as enticing as Bouef avec l'orange.
When I announced what we were having for tea tonight, Steve said, "A toasted sandwich will do me, I'm not hungry".
Sunday, March 7, 2010
Cheese and Bacon Rolls

These are just delicious. Similar to the ones that you can buy in the shop, but so much healthier - no preservatives, no additives. The idea to make them came from maddy, on the Thermomix forum. Thanks maddy!
Make a batch of dough as follows:
250g white bread mix (I use All About Bread)
250g spelt flour
2 Tbsp Bioactive Yeast (All About Bread) or 2 tsp dried yeast
2 Tbsp oat bran
2 Tbsp wheatgerm
1 Tbsp honey
1 Tbsp lecithin
1 Tbsp oil
300ml warm milk (made with powdered milk)
Place all into bowl of Thermomix. Allow to rise until it pops out of the top of the Thermomix bowl. (or place in a bowl and allow to rise until doubled)
Punch down and knead for two minutes.
Form dough into eight or so flat rolls. Next time, I'll roll them out so they're thinner. If they're rounded once they rise, it makes it difficult to put the cheese and bacon on top. Place on a tray. Allow bread and rolls to rise under a cloth until doubled again. Be patient, this may take two hours. Remember, this is slow food.
When almost ready to bake, heat oven to 180 degrees C. Brush rolls with beaten egg and top with grated cheese and diced bacon. Bake for 20 minutes.
I think next time I'll put some grated cheese in the dough and see what happens...
Wednesday, March 3, 2010
Roast Duck
Duck is a delicious restaurant meal. Whenever I see it on the menu, I always order it, thinking that it's something I'd never cook myself.
However, I was in Woolworths in Katanning a while ago when I happened to notice they stocked frozen duck. These are farmed ducks and free range. So I bought one and put it in my freezer where it's been mocking me ever since.
I had planned to cook it for Steve's birthday on Monday night, but I 'chickened' out. Now it was in the fridge mocking me. Yesterday I put it in a little brine bath, something I always do with chicken and today, finally cooked it. It was strange looking with a really long neck and of course, longer wings than a chook.
Googling 'how to cook a roast duck', I came across an excellent website that had loads of hints and tips. Things like, never stuff the cavity of a whole duck. This prevents hot air entering the cavity and cooking from the inside out. You can, however place herbs, orange zest and seasonings inside the cavity to add to the flavour when cooking. (I didn't bother)
After removing from the brine, I rinsed the excess salty water from the bird and dried it as instructed. The duck was then placed on a rack in a baking dish and sprinkled with more salt before placing in a pre-heated oven at 190 degrees C. My size 18 duck cooked for 2 hours.
It released a lot of fat, which is good, because duck fat makes for deliciously brown and crunchy roast potatoes! Once removed from the oven, I turned it breast side down so all the juices could run into the breast.
The fat and juices are setting in the fridge and tonight I'll roast some spuds in the duck fat and make gravy with the juices that have set at the bottom of the fat. The plan is to serve it with sautéed carrot sticks with steamed broccoli and snow peas.
Cooking it earlier in the day has some benefits in that I have a chance to cook something else in case it's inedible as well as being able to separate out fat and juices. Duck reheats well according to the website I checked.
There's not much meat on a size 18 duck, so I'm glad I didn't ask anyone to tea!

I'm now roasting the bones to make a brown stock. I think I'll try duck again soon!
Tuesday, March 2, 2010
Flour Tortillas
In summer, tortillas make a great wrap to have for lunch when you don't feel like bread or anything too heavy. Plus you can stuff a heck of a lot of salad into a tortilla!
Once again, I had none in the pantry, so decided to try my hand again. I'd previously made spelt tortillas without a great deal of success, so this time I made regular flour tortillas.
I used a recipe from Trudy Olive, a Thermomix user and recipe designer extraordinare.
Flour Tortillas
320g plain flour (I use bread making flour - Wallaby Brand)
30g olive oil (3 Tbsp)
1 tsp salt
1 tsp baking powder
180g warm water
Place all into Thermomix bowl and mix for 10 seconds at speed 7 to combine or whizz in the food processor until it forms a ball.
Set to knead position and knead for 3 minutes or knead by hand. Turn out onto board and rest for 5 - 10 minutes.
Form into 8 balls - I like to make sure all are the same size, so I weigh them:

Roll each piece, first between two sheets of baking paper to get it going:

The dough is quite elastic and wants to shrink back, so I use my large rolling pin first.
Once it is slightly tamed, remove the top sheet of baking paper and roll all the edges, going around in a circle until the dough is very thin. If it sticks to the paper and won't roll, lift up and place back down again.

I use my little rolling pin for this, just so the shape doesn't get weird. Be forceful with these tortillas, you can't hurt them. The shapes are still fairly weird, many looking like a map of Australia!
Have the frying pan on medium heat and spray with oil. Peel the tortilla off the paper and place into pan, pressing out to prevent it shrinking or folding on itself.

Turn when the bubbles appear on the surface. Press down if large bubbles are forming underneath.

Place onto a dinner plate and cover loosely with plastic wrap. Continue cooking each one and placing under the plastic.

I made wraps with chicken nuggets, grated cheese, tomato, lettuce and mayo. They went down a treat.
These are best kept on a plate enclosed in a plastic bag. They re-heat really well in the microwave for 15 seconds.
These tortillas make excellent vehicles for dips, especially Mexican or Turkish style dips. Cut into pieces with scissors, spray with a little oil and place in oven for 5 or 10 minutes until dry and crisp. You can sprinkle seasoned salt over them once sprayed with oil for extra flavour.
Once again, I had none in the pantry, so decided to try my hand again. I'd previously made spelt tortillas without a great deal of success, so this time I made regular flour tortillas.
I used a recipe from Trudy Olive, a Thermomix user and recipe designer extraordinare.
Flour Tortillas
320g plain flour (I use bread making flour - Wallaby Brand)
30g olive oil (3 Tbsp)
1 tsp salt
1 tsp baking powder
180g warm water
Place all into Thermomix bowl and mix for 10 seconds at speed 7 to combine or whizz in the food processor until it forms a ball.
Set to knead position and knead for 3 minutes or knead by hand. Turn out onto board and rest for 5 - 10 minutes.
Form into 8 balls - I like to make sure all are the same size, so I weigh them:

Roll each piece, first between two sheets of baking paper to get it going:

The dough is quite elastic and wants to shrink back, so I use my large rolling pin first.
Once it is slightly tamed, remove the top sheet of baking paper and roll all the edges, going around in a circle until the dough is very thin. If it sticks to the paper and won't roll, lift up and place back down again.

I use my little rolling pin for this, just so the shape doesn't get weird. Be forceful with these tortillas, you can't hurt them. The shapes are still fairly weird, many looking like a map of Australia!
Have the frying pan on medium heat and spray with oil. Peel the tortilla off the paper and place into pan, pressing out to prevent it shrinking or folding on itself.

Turn when the bubbles appear on the surface. Press down if large bubbles are forming underneath.

Place onto a dinner plate and cover loosely with plastic wrap. Continue cooking each one and placing under the plastic.

The finished tortillas on a large dinner plate.
I made wraps with chicken nuggets, grated cheese, tomato, lettuce and mayo. They went down a treat.
These are best kept on a plate enclosed in a plastic bag. They re-heat really well in the microwave for 15 seconds.
These tortillas make excellent vehicles for dips, especially Mexican or Turkish style dips. Cut into pieces with scissors, spray with a little oil and place in oven for 5 or 10 minutes until dry and crisp. You can sprinkle seasoned salt over them once sprayed with oil for extra flavour.
Monday, March 1, 2010
Creamy Curried Cauliflower Salad

Two very good cooks I know make this salad, though each salad is slightly different. My version uses blanched cauliflower as I prefer the less crunchy texture of the cauliflower.
Thanks Michelle and Robyn for inspiring this.
My version has currants instead of sultanas, as I don't like sultanas in salads.
Creamy Curried Cauliflower Salad
1/2 head of a small cauliflower
1/2 red apple
1/2 onion
2 sticks celery
1/4 red capsicum
1/4 green capsicum
handful roasted salted cashews
handful currants
1/4 cup frozen corn, cooked in microwave
Dressing
3 heaped Tbsp thickened cream
1/4 cup mayonnaise
2 tsp curry powder
1 tsp dry mustard
Cut the cauliflower into the tiniest of florets and place in a colander. Drop the colander into boiling water for about 20 seconds. Remove and drain.
(If you have a Thermomix, boil 1200ml water in TMX bowl and place florets in basket into water. Swish boiling water through the cauliflower on speed 8 for 20 seconds. Remove basket and allow to drain.)
All other vegies are chopped very finely and added to the dressing. Mix in cauliflower and allow to sit at room temperature for the best flavour.
Variations include using different vegies. I feel it really needs the apple and celery, but the corn could be substituted for peas and onion for spring onion.
Sticky Toffee Pudding
A classic winter dessert, this would have to be everyone's favourite. Whizzed up in the Thermomix, the whole thing takes about 20 minutes if made in muffin tins.
Sticky Toffee Puddings
Pre heat oven to a moderate temperature, about 175 degrees fan forced.
Place in Thermomix bowl or food processor:
1 1/2 cups seeded dates
1 1/4 cups boiling water
1 tsp bi-carb soda
Allow to stand for 5 minutes.
Add:
3/4 cup brown sugar
60g butter
Process (on speed 4) until dates are roughly chopped.
Add:
2 eggs, then 1 cup self raising flour, processing and scraping down sides until combined.
Bake in muffin tins for 15 - 17 minutes. Stand in tins 5 minutes before turning out .
Caramel Sauce
While the muffins are cooking, make the caramel sauce by placing 1 cup brown sugar, 100g butter, 300mls cream and 1 tsp vanilla in the Thermomix bowl and cook for 5 minutes on 80 at speed 4 or until thickened.
Serve muffins on a plate and pour sauce over. Place a quenelle of ice cream to one side of the muffin and top ice cream with a mint sprig.
Pantry Pancake Mix
This recipe is one from Nigella Lawson, my foodie idol. It's wonderfully versatile and very economical. There's no need to buy those pancake mixes in the plastic bottles as this is just as easy and much, much nicer.

Pantry Pancake Mix
600g plain flour (I use half wheat flour, half spelt flour)
50g baking powder
50g castor
2 tsp bi-carb soda
1 tsp salt
Whizz all together in the Thermomix or blender. Store in a jar in the pantry.
When you are wanting to make pancakes for breaky just use 1 cup milk and 1 egg for every cup of dry mix. Whisk together and let sit for 10 minutes or so. Stir in 1 Tbsp of melted butter and start making pancakes!
These pancakes are very similar to the "golden arches" sort. I adore them for breakfast with unsalted butter that I've whipped up with maple syrup in the Thermomix before freezing in ice cube trays. The mixture can be thinned down with a little more milk added to the mixture if you prefer a slightly thinner pancake.
For a dessert pancake, add some chopped banana and serve with caramel made from cream, butter and brown sugar boiled together (sticky toffee pudding sauce).
For pikelets, just add a little more sugar. You can also add chopped dates and orange rind or orange and date pikelets.
So you don't forget what you need to add, it's a good idea to write a label for the jar and include the recipe for mixing the pancakes.
Thursday, February 25, 2010
Cucumber Salad
My friend's husband has the most wonderful vegetable garden, he's a real green thumb, unlike me. We have a deal going...he shares his veges and I supply him with lip balm!
Recently, I received a huge bag of cucumbers. I love cucumbers, but there's only so much you can do with them. Fortunately, home grown produce keeps for ages. Another friend gave me some cherry tomatoes which were delicious little morsels.
My guys aren't really enamoured with cucumbers, but do love the old tomato, cucumber and onion in vinegar. I decided to re-vamp this salad tonight:

Cucumber Salad
1 cucumber
1 punnet cherry tomatoes
1/2 onion, sliced
handful basil leaves
2 Tbsp olive oil
2 Tbsp Balsamic Vinegar
Cut the cue in half lengthways and remove seeds. Slice thickly and place in a bowl with tomatoes and onions. Add vinegar and oil. Tear basil in to small pieces and add just before serving.
So simple, yet so tasty.
Saturday, February 13, 2010
Why do pro chefs choose Thermomix?
Why do pro chefs choose Thermomix?
Click the link above to view a video which shows the mighty Thermomix in action. Four top chefs use and talk about the Thermomix.
Click the link above to view a video which shows the mighty Thermomix in action. Four top chefs use and talk about the Thermomix.
Moroccan Couscous Salad
Summer means lots of BBQ's in our house. Almost every night, we cook on the BBQ. Rissoles, Salmon Patties, Fish, Chicken, it doesn't matter what it is, if it can be fried, Steve has to cook!
That means lots of salads too, which can be difficult if produce isn't always available and fresh. I love recipes that use store cupboard and freezer ingredients and I've adapted a Taste.com.au recipe. This salad is almost a meal on its own and it keeps for two or three days:
Moroccan Couscous Salad
350 - 500g cubed pumpkin
2 - 3 Tbsp dukkah
1 Tbsp peanut oil
oil for frying
250g frozen (or fresh) broad beans (or peas)
1 cup boiling water
1 cup couscous
2 tsp Thermomix Vege stock or 1 tsp vege stock powder
1 can chickpeas, drained
30g toasted pine nuts
Chopped fresh coriander (or dried, or parsley)
Lemon Mustard Dressing
Toss cubed pumpkin into a freezer bag and pour in peanut oil. Shake to coat. Add dukkah and shake around until all coated.
Fry gently in the extra oil, stirring frequently until well browned. Drain and set aside to cool.
Simmer broad beans in a little water until just tender and drain. Pinch beans out of their skins and discard skins.
Place stock into boiling water and stir to dissolve. Stir in couscous with a fork to separate. Place a cover over container and set aside for about 5 minutes or until all liquid is dissolved. Stir with fork to separate grains. Place into salad bowl and stir in all other ingredients. Finish with the Lemon Mustard Dressing to taste.
NB: If you don't have any dukkah on hand, use a combination of spices such as coriander, cinnamon, ginger and cumin and add some sesame seeds to the mixture.
That means lots of salads too, which can be difficult if produce isn't always available and fresh. I love recipes that use store cupboard and freezer ingredients and I've adapted a Taste.com.au recipe. This salad is almost a meal on its own and it keeps for two or three days:
 |
| Photography by Ben Dearnley |
Moroccan Couscous Salad
350 - 500g cubed pumpkin
2 - 3 Tbsp dukkah
1 Tbsp peanut oil
oil for frying
250g frozen (or fresh) broad beans (or peas)
1 cup boiling water
1 cup couscous
2 tsp Thermomix Vege stock or 1 tsp vege stock powder
1 can chickpeas, drained
30g toasted pine nuts
Chopped fresh coriander (or dried, or parsley)
Lemon Mustard Dressing
Toss cubed pumpkin into a freezer bag and pour in peanut oil. Shake to coat. Add dukkah and shake around until all coated.
Fry gently in the extra oil, stirring frequently until well browned. Drain and set aside to cool.
Simmer broad beans in a little water until just tender and drain. Pinch beans out of their skins and discard skins.
Place stock into boiling water and stir to dissolve. Stir in couscous with a fork to separate. Place a cover over container and set aside for about 5 minutes or until all liquid is dissolved. Stir with fork to separate grains. Place into salad bowl and stir in all other ingredients. Finish with the Lemon Mustard Dressing to taste.
NB: If you don't have any dukkah on hand, use a combination of spices such as coriander, cinnamon, ginger and cumin and add some sesame seeds to the mixture.
Thursday, February 11, 2010
Spelt and Wheat Bread

Spelt and Wheat Bread
Long have I held the view that the Western diet contains way too much wheat. It's consumed in large amounts every day. Even our 'cornflour' is wheaten flour that's been processed to make it finer and more easily mixed with water.
In my quest to try different flours, they've proven to be difficult to find and extremely expensive. Usually found at health food stores that charge outrageous prices anyway, but also only available in small quantities. Then I found a wonderful place in Greenwood called "All About Bread". They have an enormous range of flours in all different package sizes and will also send orders to the country. www.allaboutbread.com.au
Spelt is an ancient grain, having been grown in Iran around 5000 BC. It is similar in appearance to wheat, though has a tougher husk. Though it contains more protein than wheat, it's in a form that's easier to digest. It still has gluten, so isn't suitable for coeliacs.
Spelt can be used as a total substitute for wheat, but I prefer to do a blend of wheat and spelt in my cakes, biscuits and bread. Today I made bread with a 50:50 mix of the two flours:
250g strong wheat flour
250g wholemeal spelt flour
1 Tbsp honey
1 Tbsp oil
1 Tbsp lecithin
1 Tbsp pepitas
1 Tbsp oat bran
1 Tbsp wheatgerm
2 tsp salt
300g water
2 Tbsp Probiotic yeast (from All About Bread. Can replace with 2 tsp regular dried yeast)
Blend in Thermomix on the dough setting for 5 minutes. Leave to rise until popping out of the hole in the lid. Push down and blend again on the dough setting for 2 minutes. Roll out into a rectangular slab, roll up and place in tin.
Dust with flour and cut diagonal slices across the top. Leave to rise for an hour or so. Bake at 220 degrees C for 15 minutes. Reduce heat to 200 and continue to cook for 30 more minutes. To test, tip out of tin and knock on the bottom of the loaf. It should sound hollow and feel light. Sometimes, I place the loaf back in without the tin for 5 minutes for a crusty loaf.
Saturday, February 6, 2010
Vegetable Medley with Tomato Passata
This is one of those dishes that I've had at a restaurant and have re-created at home. In this case, the Venice in Albany. It's a vegetarian meal, but can be easily prepared for carnivores by the addition of some crumbed veal, pork or chicken.
This is a summer dish as you will need a lot of fresh ripe tomatoes.
It sounds complicated as there are quite a number if steps involving a bit of preparation, but it's not difficult at all. If you happen to have some left over risotto, this is a great way to use it up. The stuffing ingredients can vary depending on what's in your fridge or garden.
Vegetable Medley with Tomato Passata
1. Zucchini stuffed with roasted pumpkin, fetta and topped with mozzarella
2. Tomatoes stuffed with zucchini, spinach and basil
3. Green Capsicum stuffed with mushroom (or vegetable) risotto.
Make the Tomato Passata first:
2 kg tomatoes
30ml olive oil
1 onion
2 cloves garlic
3 Tbsp tomato paste
salt (requires quite a bit, but to your own taste) and pepper
Peel tomatoes by dropping into boiling water for a few seconds. Slit skin with a sharp knife and peel. Chop into quarters. Sauté onion and garlic in hot oil. Add tomatoes and simmer until tender. Add tomato paste and salt and pepper to taste. Blitz with a stick blender. Set aside.
While the Passata is cooking, make a Risotto of choice. I make a Mushroom Risotto in the Thermomix because I don't have to worry about stirring it. I use a mixture of dried porcini, chantarelle and fresh mushrooms.
1. ZUCCHINI
Slice zucchini in half lengthwise. Allow one zucchini for three people. Chop half of the zucchini into tiny dice for the tomato filling. Hollow out the other half and place in a steamer basket.
Filling for Zucchini
olive oil
1 cup small dice pumpkin or sweet potato
1/2 onion, small dice
1/4 cup crumbled fetta

Saute pumpkin in oil until browned, add onion and sauté until softened. Remove from heat and allow to cool. Add fetta and set aside. When zucchini half has been pre-steamed, (I use the Thermomix) press into cavity. Top with grated mozzarella.
2. TOMATO
Peel by piercing a few holes in each tomato and dropping into boiling water for a few seconds. Allow one tomato per person. Slice top from peeled tomatoes and remove seeds and flesh, leaving just a shell.
Filling for Tomatoes
1 Tbsp butter
diced zucchini
spinach leaves
basil
pepper
Sauté zucchini in butter and when soft add spinach and torn basil leaves. Stir until wilted. Add freshly ground pepper to taste. Allow to cool and fill tomatoes. Top with fresh breadcrumbs and grated parmesan.
3. CAPSICUM
I find it's best to turn capsicums upside down as the stem end is more stable. Remove the stem and turn on it's end. Slice the top from each capsicum (1 small one per person or half a large one). De-seed and remove membranes. Place in steamer basket with zucchini and steam until just softened.

Fill with risotto and top with garlic breadcrumbs and mozzarella.

Place each vegetable on a serving plate, cutting zucchini into portions and spoon sauce around base to cover plate. Top with sprigs of basil or parsley. Add crumbed veal, pork chops or crumbed chicken for the carnivores.
Unfortunately, this was devoured before I had a chance to photograph the finished product!
This is a summer dish as you will need a lot of fresh ripe tomatoes.
It sounds complicated as there are quite a number if steps involving a bit of preparation, but it's not difficult at all. If you happen to have some left over risotto, this is a great way to use it up. The stuffing ingredients can vary depending on what's in your fridge or garden.
Vegetable Medley with Tomato Passata
1. Zucchini stuffed with roasted pumpkin, fetta and topped with mozzarella
2. Tomatoes stuffed with zucchini, spinach and basil
3. Green Capsicum stuffed with mushroom (or vegetable) risotto.
Make the Tomato Passata first:
2 kg tomatoes
30ml olive oil
1 onion
2 cloves garlic
3 Tbsp tomato paste
salt (requires quite a bit, but to your own taste) and pepper
Peel tomatoes by dropping into boiling water for a few seconds. Slit skin with a sharp knife and peel. Chop into quarters. Sauté onion and garlic in hot oil. Add tomatoes and simmer until tender. Add tomato paste and salt and pepper to taste. Blitz with a stick blender. Set aside.
While the Passata is cooking, make a Risotto of choice. I make a Mushroom Risotto in the Thermomix because I don't have to worry about stirring it. I use a mixture of dried porcini, chantarelle and fresh mushrooms.
1. ZUCCHINI
Slice zucchini in half lengthwise. Allow one zucchini for three people. Chop half of the zucchini into tiny dice for the tomato filling. Hollow out the other half and place in a steamer basket.
Filling for Zucchini
olive oil
1 cup small dice pumpkin or sweet potato
1/2 onion, small dice
1/4 cup crumbled fetta

Saute pumpkin in oil until browned, add onion and sauté until softened. Remove from heat and allow to cool. Add fetta and set aside. When zucchini half has been pre-steamed, (I use the Thermomix) press into cavity. Top with grated mozzarella.
2. TOMATO
Peel by piercing a few holes in each tomato and dropping into boiling water for a few seconds. Allow one tomato per person. Slice top from peeled tomatoes and remove seeds and flesh, leaving just a shell.
Filling for Tomatoes
1 Tbsp butter
diced zucchini
spinach leaves
basil
pepper
Sauté zucchini in butter and when soft add spinach and torn basil leaves. Stir until wilted. Add freshly ground pepper to taste. Allow to cool and fill tomatoes. Top with fresh breadcrumbs and grated parmesan.
3. CAPSICUM
I find it's best to turn capsicums upside down as the stem end is more stable. Remove the stem and turn on it's end. Slice the top from each capsicum (1 small one per person or half a large one). De-seed and remove membranes. Place in steamer basket with zucchini and steam until just softened.

Fill with risotto and top with garlic breadcrumbs and mozzarella.

Mushroom Risotto, Pumpkin ( haven't added fetta yet), Zucchini/Spinach
Preheat oven to 200 degrees.
Place all stuffed vegetables into a wide dish, such as a lasagne dish and place enough Tomato Passata in to cover base of pan to 1 cm depth. Place dish in oven for about 20 minutes to 1/2 an hour or until tomato is softened and toppings are cooked and browned. While this is cooking, put the remaining Passata in a saucepan and heat gently on the stove.Place each vegetable on a serving plate, cutting zucchini into portions and spoon sauce around base to cover plate. Top with sprigs of basil or parsley. Add crumbed veal, pork chops or crumbed chicken for the carnivores.
Unfortunately, this was devoured before I had a chance to photograph the finished product!
Homemade Bickies
Rarely do I buy biscuits any more. I like to avoid unnecessary additives in my food as much as possible. I also prefer butter to margarine as it's a natural food. Most commercial bickies use margarine because it's cheaper.
Yesterday I made giant chocolate chip 'cookies' (damn American terms sneaking into our language!) from a recipe by Valli Little, of Better Homes and Gardens fame. I was bitterly disappointed with the outcome. To 300g flour, the recipe had a whopping 300g of sugar a well as 350g chocolate chips! When I made them, I used 240g sugar and 230g chocolate chips (that was the size of the packet). They were still way too sweet for me.
There's nothing worse than following a recipe and finding it's not right. I recently purchased the book "Ratio" by Michael Ruhlman. This book is a revelation for home cooks. The ratio for everything you cook is provided with explanations in simple terms. So, I checked out the ratio for 'cookie' dough, as biscuits in the US are a totally different thing.
No wonder Valli Little's recipe didn't work well! The ratio for bickies is:
3 parts flour to 2 parts butter to 1 part sugar.
Therefore, her recipe for the choc chip cookies should have been:
300g flour, 200g butter, 100g sugar.
With the addition of choc chips, the sugar could be cut even further if desired. The recipe also used brown sugar, which doesn't give that lovely contrast of the bickie and the little dark spots of chocolate.
So, I've re-created her recipe and am now claiming it as my own:
Megan's Choc Chip Bickies
200g soft butter
100g castor sugar
1 egg
1 tsp vanilla
300g plain flour
1/2 tsp bi-carb
230g dark chocolate chips
Preheat oven to 190 degrees and line two baking sheets with baking paper.
Cream butter and sugar, add egg and vanilla and cream. Sift flour and bi-carb. Fold into butter mixture with choc chips. Roll a tablespoon of dough into a ball and place on baking sheet. Press down gently.
Bake for 15 to 20 minutes depending on size of bickie. Allow to cool on tray for a few minutes before using a spatula to move them to a cooling rack.
Using this standard ratio of 3 parts flour, 2 parts butter and 1 part sugar for bickies I can create different varieties from much the same recipe. Here's a few:
For now, I'll stick with the 3:2:1 ratio and try lots of ingredient variations.
Yesterday I made giant chocolate chip 'cookies' (damn American terms sneaking into our language!) from a recipe by Valli Little, of Better Homes and Gardens fame. I was bitterly disappointed with the outcome. To 300g flour, the recipe had a whopping 300g of sugar a well as 350g chocolate chips! When I made them, I used 240g sugar and 230g chocolate chips (that was the size of the packet). They were still way too sweet for me.
There's nothing worse than following a recipe and finding it's not right. I recently purchased the book "Ratio" by Michael Ruhlman. This book is a revelation for home cooks. The ratio for everything you cook is provided with explanations in simple terms. So, I checked out the ratio for 'cookie' dough, as biscuits in the US are a totally different thing.
No wonder Valli Little's recipe didn't work well! The ratio for bickies is:
3 parts flour to 2 parts butter to 1 part sugar.
Therefore, her recipe for the choc chip cookies should have been:
300g flour, 200g butter, 100g sugar.
With the addition of choc chips, the sugar could be cut even further if desired. The recipe also used brown sugar, which doesn't give that lovely contrast of the bickie and the little dark spots of chocolate.
So, I've re-created her recipe and am now claiming it as my own:
Megan's Choc Chip Bickies
200g soft butter
100g castor sugar
1 egg
1 tsp vanilla
300g plain flour
1/2 tsp bi-carb
230g dark chocolate chips
Preheat oven to 190 degrees and line two baking sheets with baking paper.
Cream butter and sugar, add egg and vanilla and cream. Sift flour and bi-carb. Fold into butter mixture with choc chips. Roll a tablespoon of dough into a ball and place on baking sheet. Press down gently.
Bake for 15 to 20 minutes depending on size of bickie. Allow to cool on tray for a few minutes before using a spatula to move them to a cooling rack.
Using this standard ratio of 3 parts flour, 2 parts butter and 1 part sugar for bickies I can create different varieties from much the same recipe. Here's a few:
- For shortbread, replace part of the flour with ground rice.
- Replace 1/3 of the flour with ground nuts.
- For low GI bickies (diabetics etc), replace sugar with agave nectar and flour with rice flour.
- Use a combination of brown sugar and golden syrup, add 2 tsp ginger, an egg and 1 tp bi-carb for ginger bickies. Top with chopped glace ginger.
- Add 90g melted chocolate, sift flour over it and fold into butter sugar mixture.
- Add peanut paste the same way as melted chocolate.
- Use a combination of sugar and honey.
- Instead of rolling dough into balls and flattening, roll dough into a log and chill. Cut thin slices from the log.
- Top with Smarties, cherries or nuts.
- Roll in crushed nuts or crushed cornflakes.
For now, I'll stick with the 3:2:1 ratio and try lots of ingredient variations.
Monday, February 1, 2010
Ginger Chilli Chicken
This is something I came up with tonight. I love that sticky sweet/hot/salty chicken that you can get at Chinese Restaurants and wanted to make something similar. It's delicious - I wish I'd measured everything that I put in! It was a case of a blob of this and a bit of that, so I am writing this straight after I've made it in case I forget what I did.

Ginger Chilli Chicken
4 boneless chicken thighs
1 brown onion, roughly diced
3 Tbsp Peanut Oil
1 Tbsp Sesame Oil
2 cloves garlic, finely diced (2 tsp of garlic in the jar)
1 cm piece of ginger, finely diced (3 tsp of ginger in the jar)
1 diced red chilli or 1 tsp dried red chilli flakes
4 Tbsp brown sugar
1/4 cup soy sauce
1/4 cup rice wine vinegar
Heat oils and when hot sauté ginger, chilli & garlic. Add sugar and cook until bubbling and beginning to caramelise. Add vinegar and soy sauce and continue to cook. Taste to see if balance of sweet, sour and salty is right and add more of what is needed.
When thick and bubbly add chicken and stir in. Cook, stirring frequently. Add onion when chicken is cooked and stir while cooking. Remove from heat while onion is still crisp.
Serve topped with chopped spring onion. Accompany with Fried Rice and Stir Fry Vegetables in Oyster Sauce.
This is a variation that I'm going to try next time:
Schezuan Beef: Replace chicken with thinly sliced rump steak. Replace chilli with black pepper, add a little plum sauce.
Subscribe to:
Posts (Atom)