Showing posts with label Bread. Show all posts

Saturday, November 8, 2014

Soft, Fluffy Bread

I'm happy to eat tough sourdough and seedy wholemeal loaves, however, my nearest and dearest likes only soft white bread in a packet. I've tried to make a loaf like store bought for some time, but have never quite achieved the right texture.

However, I think I've found it! Over at The Road to Loving My Thermomix, Peta has developed a great recipe and has loads of tips on bread making. I learned that I have had my oven way too hot for this sort of bread. I cook at 180C now and have been making some lovely loaves and rolls using her recipe.

Rather than copy it, I'll pop a link here so you can read all the tricks of bread making yourself.

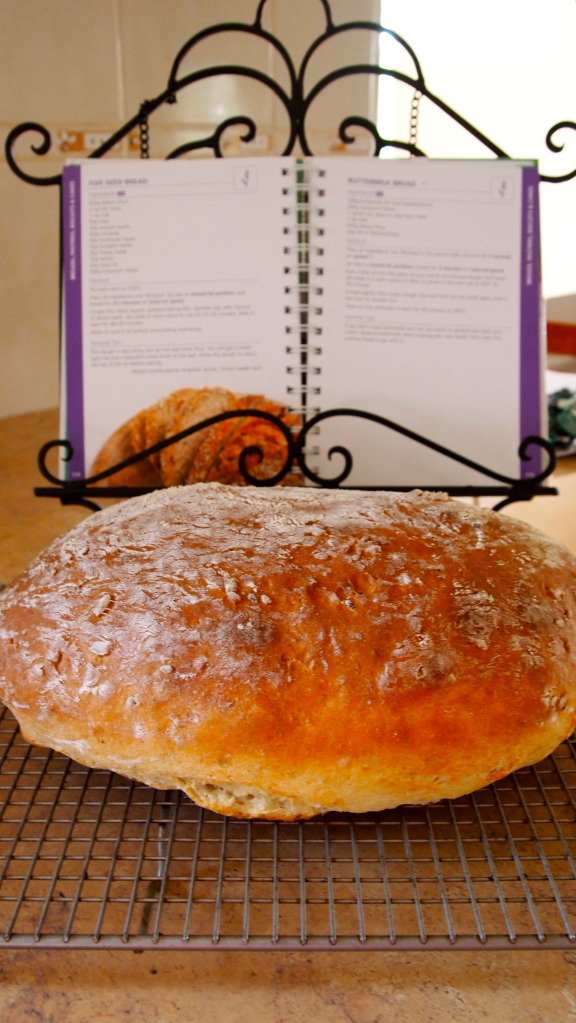
Here's one of my lovely loaves with some rolls made from the dough. This is double her normal recipe for rolls, that is, it uses 750g flour. This particular loaf has 620g strong white flour, 80g wholemeal flour and 50g white spelt flour. It made a large loaf plus 6 rolls. I leave my dough to rise until it's tripled, rather than doubled. My bread tin measures 28 x 14 wide x 12cm high. The rolls were baked in a 20cm tin.


Do try this fabulous recipe. I'd love to know how you go with it.

Megan

Sunday, June 29, 2014

Soaked Whole Wheat Bread


I have discussed the benefits of eating grains in a previous post, Grain Pain, so won't go into the nutritional aspects again. In that post, I mentioned that I have a Skippy Grain Mill and was planning to use it to grind my own wheat and use it for soaked wholewheat cooking. Well, I haven't had a lot of time to do this lately, but find myself with some time on my hands again.

I've been experimenting with sourdough, too. Sourdough requires a lot of dedication and planning. If you want to make a loaf of bread, you basically have to start two days before! It doesn't require a lot of hands on activity, mostly just sitting around doing its thing, but when it's ready to have something done to it, you have to be there to do it! So, I'm back to thinking of other ways to use our own wheat to make my bread and am revisiting the soaking idea. I found this recipe at Don't Waste the Crumbs and have given it a go with a few tweaks of my own and using the Thermomix. If you don't have a Thermomix, just mix by hand.  It's not totally wholewheat, but this will hopefully make it a little lighter and less dense.

Here's how to do it:
(Start the evening before)

SOAKED (almost) WHOLE WHEAT BREAD
The Bush Gourmand

480g whole wheat flour, freshly ground if possible
140g white bread flour
240g buttermilk (or use ½ cup yoghurt mixed with ½ cup whole milk)
¼ cup cold water
90g soft butter

Add to the Thermomix bowl and mix on dough setting for about 3 minutes or until the mixture begins to come together. It will resemble play dough.

Place in a ceramic bowl and cover with plastic wrap and leave to sit on the bench overnight or for up to 24 hours. It will look darker on the outside of the dough. Don't worry, this is perfectly normal and the bread will not be dark in colour.

Next morning, continue with the recipe below:

½ cup warm water
1 Tbsp rapadura sugar syrup (Maleo) or 2 Tbsp honey
2 ½ tsp dried yeast
2 Tbsp macadamia or other mild tasting oil

Mix together in a small jug and leave to prove for 5 minutes.
Place soaked dough back into Thermomix bowl - break it up a little. Add the proved yeast mixture and knead on dough setting for 3 minutes.

1 tsp salt
1 ½ tsp bread improver
½ tsp Vitamin C powder

Add to the dough and knead for a further minute on dough setting. Remove from bowl and place on to bench or silpat mat. Knead by hand for 5 minutes until smooth and silky. Shape into a round ball and place back into the (greased) ceramic bowl. Cover with greased plastic wrap and leave in a warm place to double in size.


Roll dough out into a rectangle shape.

Once proved, remove dough from the bowl and place onto a lightly floured work surface.

Roll the rectangle up from the shorter side and tuck in the edges.


Place into a bread tin and cover once more with the greased plastic wrap.


 and leave to rise again until it's come up above the sides of the tin.


My bread tin measures 26cm x 11 cm. I bought it online from All About Bread.


Place into a hot oven, around 225C. After 10 minutes, reduce to 200C and bake for another 20 minutes or so. Check whether it's cooked by carefully removing from the tin and tapping the base. It should sound hollow. If not, place the loaf back into the oven straight onto the racks and bake a further 5 to 10 minutes.


I like the top of my bread nice and dark, so very happy with this. If you prefer a lighter coloured crust, preheat oven to 200C and cook at this temperature.
The loaf feels nice and light and has a wonderful texture.


...and it's delicious with lashings of butter and my homemade dried apricot jam.


Megan


Friday, April 18, 2014

Megan's Dinner Rolls, et al

This recipe came about due to lots of experimentation with dinner rolls. When I finally got the recipe where I wanted it to be, I realised it would translate to a variety of different types of rolls.
The recipe makes a small quantity - 9 dinner rolls, hot cross buns and scrolls, 6 finger buns and flat hamburger buns. It's quick and easy, so a couple of batches can be made at once.


It's not what I'd call a tremendously healthy and nutritious recipe, but it's certainly better than buying rolls. I'll continue experimenting with adding seeds and using some wholemeal wheat and spelt flour.
For now, since it's Easter time and I'm making Hot Cross Buns, I'll continue with the white flour recipe.

I leave the dough to do its first rise in the Thermomix bowl, but this isn't necessary. I prefer to do this as, one, I won't forget it and two, I know when it's risen enough as the MC pops up. I'm fortunate to have two bowls, so I can always use the second bowl if the first is occupied.

Master Dinner Roll Recipe
The Bush Gourmand

225g warm water
45g instant milk powder (or use 250g warm milk to replace water and milk powder)
1 Tbsp dried yeast
2 Tbsp Rapadura sugar + 2 extra for sweet buns
1 tsp salt
60g soft butter
380g strong unbleached bread flour (spelt flour works fine)

1. Place water, milk powder, yeast, sugar and salt into Thermomix bowl and mix on speed 2 for 10 seconds. Leave for one minute.
2. Add remaining ingredients and mix on dough setting for 4 minutes.
3. Leave to rise in bowl until MC starts to pop out.
4. Add any remaining ingredients for the type of roll or bun you're making and shape as required. Use a silpat mat if necessary.
5. Place in baking tin and cover with a clean tea towel.
6. Leave to prove in a warm place until doubled in size. This can take 2 to 2 ½ hours in winter.
7. Bake for 20 minutes in a preheated 200C oven.

Dinner Rolls

Shape dough into 9 small balls and place into 20cm square tin. Continue as per Master Recipe and bake for 20 minutes in a preheated 200C oven.
Cool on a wire rack, keeping the rolls together. Or, place into a basket that's lined with a clean tea towel to keep warm for the dinner table.


Hot Cross Buns
Add with flour:
2 Tbsp mixed spice (I blend 2 tsp cinnamon, 2 tsp mixed spice, ¼ tsp nutmeg and ¼ tsp ground cloves)
Once proven in bowl, add 1 cup mixed fruit and knead for a further 20 seconds or so to incorporate.
Cut into 9 even pieces and shape into a ball. To do this, cup hands around a piece of dough and continue pushing dough to the underside until the top is smooth and round.
Place into a 20cm square cake pan and allow to rise. When nearly ready to bake, heat oven to 200C and make piping mixture.


Piping Mixture
1 Tbsp plain flour
1 Tbsp water
1 tsp macadamia oil

Mix together in a small bowl. Place into a small ziplock bag and cut a tiny piece from one corner. Pipe horizontal then vertical lines on the rolls to make the crosses.
Bake for 20 minutes or until they are nicely golden brown. Remove to a wire rack to cool. Try to keep in one piece.
Glaze if desired.

Glaze
2 Tbsp Rapadura
2 Tbsp water

Place in a small saucepan and stir to dissolve sugar. Bring to the boil and allow to boil for 20 seconds. Use a pastry brush to brush over warm rolls.

Flat Hamburger Rolls


Make the master recipe.
Divide dough into 6 and shape each into a ball. Place into a large shallow sided (about 2 cm, enough for rolls to rise) baking tray and press down, making sure there’s plenty to space between each bun. Cover with a silpat mat or well greased foil. 
Place another tray on top of the mat and prove as per instructions. Use 2 tea towels to cover completely.
Bake with tray still on top.

Finger Buns


Make the master recipe, adding the extra sugar.
Divide dough into 6 even pieces. Roll each into a ball, then flatten and roll up to make a sausage shape. Place into a medium sized oven dish or tray, so they have a little room between them, to prove.
Bake as per master recipe. 
Allow to cool completely on a wire rack.
Place icing ingredients into Thermomix with butterfly attached.
Blend on speed 2, then increase to speed 4 until creamy.
Ice buns and then sprinkle with coconut.

Icing
1 ½ cups icing sugar
100g soft butter
1 Tbsp milk
Natural pink food colouring, optional
Desiccated coconut, optional

Scrolls

Make master recipe.
Shape dough into a rectangle on a silpat mat. 
Brush dough with melted butter and sprinkle with cinnamon and sugar 
Roll dough up from long end into a log. Cut into 9 pieces and place into small square baking dish.
Continue as per master recipe.
Mix icing ingredients together. Leave scrolls for 10 minutes to cool a little, then pour over.


Spice Mixture
60g butter, melted
100g rapadura or coconut sugar
1 Tbsp cinnamon

Icing
1 cup icing sugar
1 Tbsp butter
1 Tbsp hot water
1 tsp vanilla

I'd love to see photos of your creations from this recipe on The Bush Gourmand Facebook Page.

Megan


Sunday, July 21, 2013

Healthy Homemade Burgers

Talking to a friend recently about meal planning and thinking of interesting meals to have each night. She commented that Friday night is burger night and Sunday night is fish and chip night.
I thought that was a great idea, so have adapted it to my eating style. 

We have burgers on one day of the weekend and fish with healthy chips another day. Tonight is burger night and I've made delicious flat hamburger rolls from the recipe I've posted previously, but swapped out half the white bread flour for wholemeal spelt. I added some chia seeds and a sprinkling of rolled oats to the mixture.The water content needs to be raised to 380g to 390g.


Chicken Burgers are on the menu, so I've devised a healthy Chicken Schnitzel by borrowing a recipe from my daughter. She was inspired by her nanna, my husband's mum to bake her Chicken Schnitzel as my Mother in Law baked everything, even steak!

First of all, you will need to make a batch of KFC spice mix, another wonderful recipe from forumthermomix.com. 
Add 1 heaped Tbsp of the spice mix to 1/2 cup or so of flour of your choice into a bowl. I use brown rice flour or wholemeal spelt. In another bowl pour in some buttermilk or yoghurt. In the last bowl, pour in some cornflake crumbs or rice crumbs. I just whizz up some cornflakes in the Thermomix to make the crumbs.

For two people, one chicken breast is enough. Heat oven to 220 degrees C and place a lined tray in to heat.
Slice in half horizontally to make two thin pieces. Coat in the seasoned flour, then buttermilk, then cornflake crumbs. Coat thickly with the crumbs. Set aside in the fridge until oven is hot enough.

Spray the tray with cooking spray and place chicken on the tray, spraying again. Cook for 20 to 25 minutes, depending on thickness.


Put your burger together with your favourite fillings. I like tomato, onion, avocado and lettuce with low fat dijonnaise. 
No photo because I devoured it!

Megan

Saturday, June 8, 2013

Flat Hamburger Buns & Vegemite Scrolls


When I have a burger, I don't want it to be all bun, I like to load up the fillings. I love those flat, round buns that you can sometimes get from the supermarkets, but most often from chain bakeries such as Baker's Delight. But, I've always wanted to make them myself.

I have a brilliant recipe for bread rolls from forumthermomix.com called Bread Rolls in Under an Hour. And, you certainly can make them in that time, but I do prefer a longer prove time. The rolls are gorgeous and soft inside and there's a recipe for a lovely crunchy topping.

I won't reprint the recipe here as the link will take you to it. I prove in my Thermomix bowl for about an hour or so until it's almost popping out of the top. Once shaped, I allow them to double in size, another hour or so.

To make the burger buns, simply cut the dough into 8 pieces, as per the recipe and put two aside. Make the 6 pieces into a round shape and stretch out as much as possible to flatten. Place onto a large baking tray that is lined with baking paper or a silicone mat, leaving room for spreading. Place a piece of baking paper or a lightweight silicone mat over the top of the rolls.

With the remaining two pieces, join them together and roll out into a rectangle shape. This will require some patience as the dough will want to spring back to it's original shape. Persevere.


Mix some Vegemite with butter and spread over the dough. Add some grated cheese and roll into a log. Cut into 1cm pieces and place on another lined tray that will fit over the rolls.
Cover with a cloth and allow to prove until doubled.
In the last 10 minutes of proving, preheat the oven to 225 degrees C.

Bake as is on the top shelf of the oven for 15 minutes. Remove top tray and place on a shelf underneath for a further 5 minutes.
Remove scrolls and allow to cool a little before placing on a rack. Check that rolls are cooked by tapping the base of one. Remove to a rack to cool completely.

Makes a fantastic steakburger

Hamburger Bun the next day ready for the toaster
   
Cut in half to reveal a lovely fine texture and soft interior.

NAILED IT!

Megan

Saturday, May 4, 2013

Bread Rolls in Under an Hour

This recipe comes from one of the members from www.forumthermomix.com, where all great Thermomix recipes can be found along with helpful hints.


These rolls can actually be on the table in less than an hour. They are light and fluffy inside with a delicious crusty top, closest to bakery rolls I've ever made. They are slashed with a sharp knife before the second rise. You can see from the photo that I started making a cross shape, then got tired of that and just went with the one cut across the top.

Bread Rolls in Under an Hour
forumthermomix.com

600g bread flour
350g lukewarm water
2 Tbsp oil (I use Rice Bran)
2 tsp Bread Improver
1 tsp salt
2 1/4 tsp dried yeast

Add all the ingredients to the TM bowl and knead for 4 mins.
Allow to rise in the bowl for 10 minutes, MC in place.
Knead for 30 seconds (I forgot this step and it didn't make any difference)

Remove from bowl and place on ThermoMat. Roll into a log shape and cut into 8.
Shape each piece into a roll and place on a baking tray.
Slash tops with a sharp knife and cover tray with a cloth.
Place in a warm spot to prove for 10 minutes. (I left mine for 20 or so in the car)

In a small bowl, mix:

2 tsp rice flour
1 Tbsp milk
2 tsp oil

Brush rolls with the above mix and place into a cold oven set to 220C.
Bake for 25 minutes. Remove to a cooling rack. If planning to use straight away, wrap in a clean tea towel and place in a basket.


Sunday, April 22, 2012

Buttermilk Bread


This recipe is in the Thermomix Everyday Cooking book and I added some pepitas, pumpkin and linseeds. I've heard that it's a little difficult to make because the dough is very soft and sticky.

I've learned that with very soft doughs, one must not play with them too much. They will just get stickier! And, when you do try to knead a soft dough, there's a tendency to add flour to it to make it more manageable. This just changes the entire ratio of flour to liquid and the resultant loaf will not be as soft and fluffy as it should.

For the first rising of this loaf, I oiled my hands to remove the dough from the Thermomix bowl on to the ThermoMat. I then wrapped it up and placed it in the warm, turned off oven. Dough likes to have to work at rising, so wrapping it in the mat makes the dough work harder.

Unfortunately, I got chatting to my DD and when I checked the dough after a good hour, it had escaped from the mat and oozed into my oven! Luckily, I had cleaned the oven recently, so I just scraped it all back up and used a little flour to form a Vienna shaped loaf. The dough was already quite large, so instead of a second rising, I popped it into a cold oven set to 220C and baked it for around 20 minutes (still chatting with my DD, so not sure). The loaf rose beautifully without spreading out too much.

The inside is deliciously soft and fluffy and filled with holes like Ciabatta. I highly recommend this recipe. It would also make an excellent Cob Loaf.

Wednesday, June 8, 2011

TangZhong Bread


TangZhong is the name of a starter that is used in the making of asian style soft sweet bread. I read about it on this blog and decided to try it out as the consistency of the cooked bread looked so soft and luscious.
I used the Thermomix to make the TangZhong, but you can use a saucepan easily enough.  I reduced the sugar to make the loaf less sweet. It had a lovely texture and didn't have that 'yeasty' smell that home made loaves often get after a few days.

Tang Zhong Starter

250ml water
50g bread flour
Place in  locked and cook for 5 1/2 minutes/60/speed 4, or cook on stove, stirring constantly until thick and glossy.
Scrape out and place in a bowl on the bench (or fridge if you're in a hot area) to cool to room temperature.

Bread
500g bread flour (Wallaby)
160g TangZhong starter
200g water
2 tsp salt
30g sugar
2 tsp yeast
50g melted cooled butter (I just melt in the microwave)
I also added my 90g of mixed seeds
Place all in  locked and mix on  corn for 15 minutes. If you have a breadmaker, let it go through the knead cycle twice. This will give it a fantastic start.
Remove (flour hands so they don't stick to dough) and prove in a warm spot until doubled. Orr you can an allow the dough to prove in the TMX and then do next knead in the TMX as well)
Knead again by hand for a few minutes and then place in bread tin in a warm spot. Cover with a billowed plastic bag. It should rise above the tin.

Bake at 220C for 25 minutes. Remove from tin and bake a further 5 - 10 minutes. Cool on a rack.

Here's another picture of a much better loaf that I made with this starter after I realised that my yeast was out of date:

Saturday, February 26, 2011

The Challenge - Thursday Week 2

Everyone got their own breaky this morning as DD staying here and up early to go to work. DH was up even earlier to check sheep and cart water. I had my usual tomato and avocado between toast. Yucky bought bread from the freezer as no home made left.


Lunch was a wrap with meatloaf from the other night, last of the coleslaw, tomato and cucumber with some egg mayo spread on the base.

I made a loaf of bread today and left it to rise too long in the tin.  It's a high rise loaf, but not normally that high! My DD calls this style of loaf "Bum Bread".


Tea was Chilli Con Carne using the recipe from the Thermomix Every Day Cookbook. I added a few teaspoonfuls of cumin. I didn't have any Red Kidney Beans, so had to use a can of 5 Bean Mix. It was OK, but need green capsicum.
I didn't have any lettuce as I hadn't had time to shop today. So, we had it with corn chips, tomato, avocado, sour cream mixed with yoghurt and grated cheese. Not bad at all.

Wednesday, February 2, 2011

Panko Breadcrumbs


Panko Breadcrumbs are a Japanese product that's become popular, due in large to TV Shows like Masterchef. I refuse to buy it as it contains palm oil which I try to avoid in my food. It's also overpriced and so easy to make at home.

My mum used to make  dried breadcrumbs from left over white bread and no one thought it was anything special, so why is Panko so?

I found a really interesting video on YouTube from UpperCrust Bakery somewhere in the US. Panko simply means small pieces.
The history of Panko isn't thousands or even hundreds of years. It was developed during WWII when the Japanese were fighting the Russians. They wanted to bake bread without heat, so created a method that used electric current.

The bakery in the video makes it this way today, using only electric current which has little heat, but still cooks the bread. The dough is risen three times.  It comes out of the special ovens white and crustless, before being air dried for 18 hours and then made into breadcrumbs.

Fascinating! I bet the original Japanese version didn't have palm oil as they wouldn't have had access to it. I imagine they would have used something like rice bran oil.

The reasoning behind Panko's popularity is the fact that it's flaky rather than crumbly, so doesn't soak up as much oil as regular crumbs. It lacks any flavour, so is a good vehicle to carry other flavours.

I'm sticking with Mum's tried and true slow dried breadcrumbs from ordinary white bread. I don't eat white bread, but buy it for my husband. Why is that most men prefer white bread? To me, it's like glue.

Anyway, I have some crumbs in my oven right now.
Lightly blend (speed 4 or so and check after a couple of seconds) crustless bread in the Thermomix and spread the crumbs on a tray to dry out on very low heat - around 100C. If you leave the bread out on the bench for a few hours to dry out before blending, it will take less time. Normally, it takes about 3 or 4 hours. Store them in a large coffee jar in the cupboard.

The classic use for Panko is to crumb fish and chicken for either deep or shallow frying.  They're very versatile.  You can make a great crusty casserole topping by adding some grated parmesan or ordinary cheddar cheese and a little melted butter.  Cauliflower Cheese takes on a new dimension when topped with buttery, crispy breadcrumbs.

Saturday, May 8, 2010

Making Bread with a Ferment


SPELT/WHEAT BREAD


Bread making is a fascinating subject to someone like me who likes to perfect and conquer any commercial made products. The picture above shows today's loaf which is a blend of wholemeal spelt flour and white wheat flour with linseeds and sesame seeds. It has a sprinkling of oat flour on top.

It's easy to make a loaf of bread, but I want to make a loaf of bread that is healthy, as well as having similar qualities to commercially made bread. That lovely softness and the fine texture of soft wholemeal bread is something I aspire to achieve.

I'm getting there very slowly with additions such as Wonder Fresh and Natural Bread Improver from All About Bread in Greenwood. These products only need to be added in small amounts and contain natural enzymes to help create a softer crumb and better keeping ability. I also use Ascorbic Acid, or Vitamin C powder, as it is a natural preservative for home made bread.

Another tip I've learned from reading online Richard Bertinet's Bread information is to make an extra 300g  of dough, then keep that 300g aside and place it in the fridge for up to three days. When making the next loaf, add this ferment to the regular dough. Prior to forming the bread or rolls, remove the 300g extra and place it back in the fridge for the next time you make bread.

I've been using this method for some time now and have been able to reduce the amount of yeast I use by 25%.  The bread also develops a better flavour.

This isn't a true ferment as such, because true ferments will have to be refreshed with double its weight in flour and water.What happens though, is that after a while the dough becomes too large and the extra is thrown away. That seems like a waste, so I'll keep using the method I'm using now.

Thursday, April 8, 2010

Hot Cross Buns


I know that Easter is over for another year, but I had a number of failures trying to make HXB's this year and finally discovered that I didn't read the recipe correctly!!
So, not to be outdone, I tried again. This time with the right amount of yeast...
The recipe I used is from the cookbook that comes with the Thermomix, Everyday Cooking.
I've modified it slightly.

Hot Cross Buns
235g warm water
2 Tbsp. milk powder
4 tsp dried yeast
1 tsp cinnamon
1 tsp ground nutmeg
1/2 tsp bun spice essence (available from All About Bread)
1/2 tsp ground cloves
70g butter
1/2 tsp lemon oil (or essence)

Add the above ingredients to the Thermomix bowl and heat to 90C on speed 1 for 50 seconds.

1 egg
500g bread mix (I used High Fibre White)
1 1/2 tsp Wonder Fresh (All About Bread)

Add the above ingredients to the liquid and knead on the dough setting for 3 minutes.

170g of any dried fruits. (currants and sultanas, dried apricots (chop in TMX first), cranberries, mixed fruit)

Add to dough and mix for about 10 seconds on speed 5. Turn out and knead gently to further incorporate fruit.
Place in a greased bowl and cover with a tea towel. Put in a warm place and allow to rise until doubled in size. This takes about an hour and a half.
Punch down dough and shape into a log. Cut log into three even pieces (I weigh mine).
Cut each piece into four (approx 93g each), making 12 dough balls.


Roll into balls and then press through your thumb and forefinger to make a mushroom shape, twisting the base of the dough ball. Put any exposed fruit to the bottom.
This ensures that the dough is shaped into a smooth ball and the fruit doesn't burn when the buns are cooked.


Place into a small baking dish lined with baking paper. Cover with a damp tea towel and allow to rise for 1/2 an hour or so, until doubled again. 15 minutes before cooking, pre heat oven to 220C.

To place crosses on buns, mix the following together and place in a ziplock bag.

60g  plain flour
60g water
1 tsp icing sugar

Squish together until blended.
Cut a small hole in one corner and pipe mixture in lines long ways then cross ways on buns.


Place in oven and bake for 15 minutes or until a nice golden colour.
While they're baking make the sugar syrup:
1 Tbsp water
1 Tbsp sugar
Place in a small saucepan and heat until bubbling and sugar is dissolved.

Brush with hot sugar syrup while warm.


 Next time, I'd prove the shaped buns a lot longer to create a softer, lighter bun. Also, oven should only be at about 180 if fan forced as I found these were a bit hard on the bottom.

Sunday, March 7, 2010

Cheese and Bacon Rolls


These are just delicious. Similar to the ones that you can buy in the shop, but so much healthier - no preservatives, no additives. The idea to make them came from maddy, on the Thermomix forum. Thanks maddy!

Make a batch of dough as follows:

250g white bread mix (I use All About Bread)
250g spelt flour
2 Tbsp Bioactive Yeast (All About Bread) or 2 tsp dried yeast
2 Tbsp oat bran
2 Tbsp wheatgerm
1 Tbsp honey
1 Tbsp lecithin
1 Tbsp oil
300ml warm milk (made with powdered milk)

Place all into bowl of Thermomix. Allow to rise until it pops out of the top of the Thermomix bowl. (or place in a bowl and allow to rise until doubled)
Punch down and knead for two minutes.
Form  dough into eight or so flat rolls. Next time, I'll roll them out so they're thinner. If they're rounded once they rise, it makes it difficult to put the cheese and bacon on top. Place on a tray. Allow bread and rolls to rise under a cloth until doubled again. Be patient, this may take two hours. Remember, this is slow food.
When almost ready to bake, heat oven to 180 degrees C. Brush rolls with beaten egg and top with grated cheese and diced bacon. Bake for 20 minutes.

I think next time I'll put some grated cheese in the dough and see what happens...

Tuesday, March 2, 2010

Flour Tortillas

In summer, tortillas make a great wrap to have for lunch when you don't feel like bread or anything too heavy. Plus you can stuff a heck of a lot of salad into a tortilla!

Once again, I had none in the pantry, so decided to try my hand again. I'd previously made spelt tortillas without a great deal of success, so this time I made regular flour tortillas.

I used a recipe from Trudy Olive, a Thermomix user and recipe designer extraordinare.

Flour Tortillas
320g plain flour (I use bread making flour - Wallaby Brand)
30g olive oil (3 Tbsp)
1 tsp salt
1 tsp baking powder
180g warm water

Place all into Thermomix bowl and mix for 10 seconds at speed 7 to combine or whizz in the food processor until it forms a ball.
Set to knead position and knead for 3 minutes or knead by hand. Turn out onto board and rest for 5 - 10 minutes.
Form into 8 balls - I like to make sure all are the same size, so I weigh them:


Roll each piece, first between two sheets of baking paper to get it going:


The dough is quite elastic and wants to shrink back, so I use my large rolling pin first.
Once it is slightly tamed, remove the top sheet of baking paper and roll all the edges, going around in a circle until the dough is very thin. If it sticks to the paper and won't roll, lift up and place back down again.


I use my little rolling pin for this, just so the shape doesn't get weird. Be forceful with these tortillas, you can't hurt them. The shapes are still fairly weird, many looking like a map of Australia!

Have the frying pan on medium heat and spray with oil. Peel the tortilla off the paper and place into pan, pressing out to prevent it shrinking or folding on itself.


Turn when the bubbles appear on the surface. Press down if large bubbles are forming underneath.

Place onto a dinner plate and cover loosely with plastic wrap. Continue cooking each one and placing under the plastic.

The finished tortillas on a large dinner plate. 

I made wraps with chicken nuggets, grated cheese, tomato, lettuce and mayo. They went down a treat.

These are best kept on a plate enclosed in a plastic bag. They re-heat really well in the microwave for 15 seconds.
These tortillas make excellent vehicles for dips, especially Mexican or Turkish style dips. Cut into pieces with scissors, spray with a little oil and place in oven for 5 or 10 minutes until dry and crisp. You can sprinkle seasoned salt over them once sprayed with oil for extra flavour.

Thursday, February 11, 2010

Spelt and Wheat Bread

  Spelt and Wheat Bread

Long have I held the view that the Western diet contains way too much wheat. It's consumed in large amounts every day. Even our 'cornflour' is wheaten flour that's been processed to make it finer and more easily mixed with water.

In my quest to try different flours, they've proven to be difficult to find and extremely expensive. Usually found at health food stores that charge outrageous prices anyway, but also only available in small quantities. Then I found a wonderful place in Greenwood called "All About Bread". They have an enormous range of flours in all different package sizes and will also send orders to the country. www.allaboutbread.com.au

Spelt is an ancient grain, having been grown in Iran around 5000 BC. It is similar in appearance to wheat, though has a tougher husk. Though it contains more protein than wheat, it's in a form that's easier to digest. It still has gluten, so isn't suitable for coeliacs.

Spelt can be used as a total substitute for wheat, but I prefer to do a blend of wheat and spelt in my cakes, biscuits and bread. Today I made bread with a 50:50 mix of the two flours:

250g strong wheat flour
250g wholemeal spelt flour
1 Tbsp honey
1 Tbsp oil
1 Tbsp lecithin
1 Tbsp pepitas
1 Tbsp oat bran
1 Tbsp wheatgerm
2 tsp salt
300g water
2 Tbsp Probiotic yeast (from All About Bread. Can replace with 2 tsp regular dried yeast)

Blend in Thermomix on the dough setting for 5 minutes. Leave to rise until popping out of the hole in the lid. Push down and blend again on the dough setting for 2 minutes. Roll out into a rectangular slab, roll up and place in tin.
Dust with flour and cut diagonal slices across the top. Leave to rise for an hour or so. Bake at 220 degrees C for 15 minutes. Reduce heat to 200 and continue to cook for 30 more minutes. To test, tip out of tin and knock on the bottom of the loaf. It should sound hollow and feel light. Sometimes, I place the loaf back in without the tin for 5 minutes for a crusty loaf.

Thursday, January 28, 2010

Spelt Tortillas

Today I wanted to have wraps for lunch and the local store didn't have any in stock. So, what to do?  Make my own...

I did a search of my favourite site www.forumthermomix.com and found that Jo, a member who has a fabulous blog called Quirky Cooking has a recipe for Spelt Tortillas. Having just received my order of Spelt Flour from All About Bread, this was a perfect opportunity to try her recipe.

Jo's Spelt Tortillas
1. Mix together in food processor or Thermomix until blended:
- 2 cups (300g) spelt flour 

- 1 t sea salt
- 2 t baking powder (optional, but I think they're nicer with)

2. Add and process until completely mixed:
- 2 Tablespoons butter

3. With processor/Thermomix running on medium speed (Thermomix speed 6), add water in a slow stream, until dough forms a soft ball. Let it process on med. speed for about 5 seconds more.
- approx. 1/2 cup water (I used almost a cup to get the right consistency)


4. Poke dough with your finger - it shouldn't be overly sticky, but it should be nice and soft and stretchy  - if it's too hard, the tortillas will be thick and tough. (And if it's too sticky they'll be hard to roll.) Add more flour or water if you need to.

5. Heat up your pan - you can use an electric frypan, or a large iron skillet or non-stick frypan. It needs to be quite hot - between hot and medium hot. After you've cooked one you'll know whether it needs to be turned up or down. Don't put any oil in the pan.

6. While the pan's heating up, flour the table/counter and pinch off a ball of dough, Squish it into the flour, coating both sides, then roll out with rolling pin, flipping it over back and forth to keep it from sticking. (You'll use quite a bit of flour for rolling them out.) Don't worry if they're not pretty circles - rectangles are fine, all tastes the same. Roll it as thin as you can, only a couple of millimetres thick.

7. Dust it off a little if it's too floury, carefully peel off table, and place in hot, dry pan. While it starts to cook, begin the next one, reflouring the table first... but keep an eye on the pan, turning the tortilla over once it starts to bubble. It should have little brown spots on it. It only takes a few seconds per side - if the heat's too low, they'll be hard and crunchy, so cook them hot and quick for nice soft ones. 


8. As the tortillas cook, put them on a dinner plate inside a plastic bag, and close it up after you put each one in. This keeps them soft and warm until you're ready to eat.

I'm afraid mine didn't turn out quite as I expected initially. It was difficult to get the tortillas into the hot pan without them wrinkling up or folding over on themselves. I did, however, manage to get a few decent looking tortillas made.

Tuna and salad wrap for lunch! Very tasty.

Thursday, January 21, 2010

Wonder Bread

I've been working on my bread recipe for months now, trying to get it perfect. It's pretty much exactly how I like it now, so I'll put the recipe here for posterity.
I use Lauke's Wallaby Bread Flour, available at Woolworths. I often put in some other types of flour in the mix such as Kamut and Spelt. These are available from All About Bread in Greenwood. I've made it with only Kamut and it still worked perfectly. Kamut is an ancient grain from Africa. Similar to Spelt, it has gluten, but in a more easily digestible form than wheat.

WONDER BREAD

500g bread flour (a blend is wonderful)
300g tepid water
1 Tbsp lecithin (optional)
1 Tbsp honey
1 Tbsp oil
3 Tbsp seeds (I use pepitas, sunflower and flax)
1 Tbsp salt or, to taste
1.5 tsp Wonderfresh (avail from All About Bread)
1 tsp Natural Bread Improver ( '' )
2 tsp dried yeast

Mix on corn for 5 minutes. Leave to rise in  locked until peeking out of the top. (Thanks to Isi from Portugal who is on the Thermomix Forum. This was her idea to leave it in the TMX for the first rise.) Poke down and mix on corn for another 2 minutes. Roll out to a rectangle shape and roll up like a sausage, place in large tin. Leave to rise in fridge overnight, if desired, or as normal. Bake for 25 minutes on 200. Remove from tin and place back in oven for 5 minutes. (optional for really crusty bread)

If you're one of those unlucky people who don't own a Thermomix, you could still do this in the breakmaker or by hand.