Saturday, November 23, 2013

Grain Pain

As a grain farmer, it is in my best interests to promote grains as a part of a healthy diet. However, when people ask me about weight loss, the first thing I say it to try a gluten free diet for a while.

My reasoning is, that the Western Diet relies far too much on wheat. It is in everything from custard powder, cornflour, seasoning mixes, soup mixes etc. It isn't so much that wheat is a problem, it's the fact that it isn't prepared correctly for our bodies to assimilate the proteins it contains, known collectively as gluten. As the name suggests, gluten is the glue that holds everything together when wheat flour is used to make cakes, bread, biscuits and sauces.

Gluten is a generic name for the proteins found in a specific sub-group of grains - the Pooideae family of grasses. Wheat, oats, barley & rye belong to this grass family. Each grain contains a different type of protein, for example rye contains a protein called secalin and oats have a protein known as avenin.
Gluten from wheat is actually a composite of two proteins - gliadin and glutenin.

Wheat proteins can be particularly difficult for some people to digest. Around 1% of the population cannot have any gluten in their diets at all due to a condition called coeliac disease which is an immune reaction to proteins found in wheat, barley, oats, triticale and rye. The tiny finger-like villi in the large intestine (bowel) become inflamed and flattened, leading to malabsorption of nutrients and a host of symptoms including bloating.

When people are overweight or eating the wrong sorts of foods - eg highly processed (generally the two go together), the villi in the bowel can be compromised. They may be clogged, blocked and even laying down flat so that nutrients aren't getting to all the tissues and organs in the body that need them. Consequently, many systems begin to fail and various conditions raise their ugly heads - gallstones, arthritis, IBS, type 2 diabetes, ulcerative colitis, gout and a host of other conditions and diseases.

Are you still reading? Good on you! Here's a couple of pictures to break up all the verbosity.


Healthy villi


Damaged villi

Therefore, removing gluten from the diet for a month or so can make a real difference to the body. The villi need to be in great condition in order to digest grains efficiently and gain the benefit of the vitamins (particularly the B vitamins), minerals, phytonutrients and fibre that they provide for ultimate health.

Once the body begins to recover and a whole foods diet is being followed, the villi will recover and begin to do the job they were designed to do. The body begins the recovery process and many people find that conditions they've lived with for years disappear. This is when whole grains can be added back into the diet.

By whole grains, of course I mean the complete grain - the bran which is the outer layer, the endosperm which is the inner layer and the germ, the heart of the grain. All these work together to assist with digestion of the grain. The germ of any grain will not survive nutritionally  for very long outside the grain. The endosperm will also lose a significant percentage of its nutrients when the outer bran is removed.
White flour is simply the endosperm of the grain that is left once the bran and germ are removed. Many healthy breads and bread mixes add back the bran and germ after milling. I find this amusing. ....Pull it all apart, allow some of it to break down and lose its nutritional value, then put it all back together and call it healthy.....

The best way to prepare whole grains for better assimilation and digestion is to soak, ferment or sprout them. Both nuts and grains contain phytic acid in their outside layer. Phytic acid can bind with key minerals needed from the nut or grain so they are less available to the body. Soaking, fermenting or sprouting grains in particular will also allow enzymes, lactobacilli and other helpful organisms to not only neutralise the phytic acid but also break down and release the complex starches and proteins within the grain to allow for easier digestion.

 Sue Gregg of Sue Gregg cookbooks has developed some fantastic recipes using what she calls 'blender batters' using a two stage process. The grains are soaked in an acid medium ( usually whey but lemon juice is adequate) for 12 to 24 hours and then blended to a smooth batter. Eggs, flavouring and rising agents are added before baking.
There is no need to use whole unground grains, either. You can just as easily use whole grain flour and soak the batter. Just click for my Coffee Cake recipe and Blender Batter Waffles.  Both are also delicious, though both of these are wheat free.

I am now the proud co-owner of a fantastic Skippy Grain Mill and have been experimenting wheat from our farm. I've been grinding it to make wholegrain wheat flour and have developed a great recipe for almost wholegrain bread. The preparation needs to begin the night before you want your bread as the flour is soaked overnight.
Find the recipe here.  Soaked Whole Wheat Bread


Megan


Sunday, November 17, 2013

Blender Batter Coffee Cake - Wheat Free

I've just received all of Sue Gregg's recipe books. If you don't know who Sue Gregg is, she's an advocate of whole food cooking and teaches people how to cook the whole foods way.
She encourages soaking of grains a la Sally Fallon, another whole food champion.

When using whole grains, the outside of the grain, or bran is still intact so the grain is far more nutritious. However, there is a belief that the bran contains phytic acid which can cause malabsorption of certain minerals, particularly calcium. Therefore, soaking in an acid medium is recommended to break down this substance.
Soaking also makes whole grains easier to digest. Ancient peoples always soaked grains prior to using them for flour.
The problem with this method is that you generally need to start either first thing in the morning or the night before. I'm getting used to this as we've been incorporating more legumes into our diet, so each night before I go to bed, I stop and think.....'do I need to soak something before I turn in?'

This particular recipe only needed a three hour soak, so I played with it yesterday. Sue Gregg tends to use one flour whereas I like to blend together a mix of different ones. You can muck about with the blend to suit yourself or what you have in the pantry. Rolled oats, brown rice, kamut, quinoa would all be nice. I've used barley in this recipe and barley does contain gluten. However, the type of gluten in barley is much easier to digest than that found in wheat.

Her recipe used almonds and rolled oats for the topping, but I had some leftover pecan topping, so I just used that.
Oh, and there's no coffee, it's a type of cake, like a Tea Cake.


Pecan Coffee Cake
Batter
Blend on highest speed of blender or food processor until reasonably fine. (This took about two minutes in my TMX):
150g pearled barley
50g buckwheat
25g amaranth
25g millet

3/4 cup yoghurt or soured milk and 1/4 cup hot water
1/4 cup melted butter
3/4 cup warm honey

2 eggs

1 tsp baking powder
1 tsp baking soda
1 tsp cinnamon
1/2 tsp ginger
pinch salt

Topping:
80g rapadura or coconut sugar
50g toasted pecans
1 1/2 tsp ground cinnamon


For the batter, grind the grains and seeds in food processor or Thermomix until fine, about two to three minutes on high speed.
Add the liquid ingredients (except eggs), blend for a few seconds and leave to sit in a warm place for about three hours. I just left the batter in the Thermomix bowl. You could put it in the Thermoserver.

Meanwhile, make the topping by blending ingredients until crumbly. Set aside.


When ready to bake, preheat oven to 165C and grease and line a 20cm round or square tin.  Make sure lining goes above tin so you can pull cake out using lining. If you tip it upside down, the topping will go everywhere. (ask me how I know....)

Blend the batter for a couple of minutes. This will make the batter lovely and smooth since the grains are now soaked. Add the eggs to the batter and blend another minute or two. Add blended rising agents and spices and mix to incorporate.

Pour batter into prepared pan and sprinkle topping over. Press topping in gently with palm of hand. Bake for 35 to 40 minutes or until cake springs back when gently pressed. Remove to a wire rack.

Serve warm or cold.

Tuesday, October 29, 2013

Home Made Soy Milk

Soy Milk isn't everyone's cup of tea, so to speak, but I've been having it in my tea and coffee for over 20 years now.
The Spring of 1994 was a very bad year for hay fever and I suffered badly. My hay fever didn't dissipate once Summer came. It went through to Autumn and Winter. After trying a few doctors who wanted to prescribe cortisone, I finally visited a Naturopath.

Back then (sounds like forever ago!), Naturopaths weren't considered to be health professionals by the government so there was no health rebates available.
Janelle immediately revised my diet and I was basically on a detox for 6 months. No dairy, no wheat, no yeast, no sugar, no alcohol. It was incredibly hard as there just wasn't the foods or ingredients readily available, especially where I lived. I lost about 5 kilos and I wasn't particularly big anyway.
But, my hay fever went away! I haven't suffered from hay fever in all that time. Maybe the occasional sniffle, but nothing to worry about....except for this year, but that's another blog post.

Since that time, I reintroduced all those items back into my diet but have found I'm not particularly fond of dairy anymore. I just can't stomach cow's milk in my tea and coffee and rarely eat cream. I like a little cheese and eat a lot of yoghurt, though!

Over the years I've been buying soy milk in the UHT cartons. There's only a couple of brands that I like and one of those is Vitasoy Vitacafe. I don't know how many of these little containers I've left at various places in all that time. I'd take one with me wherever I went so I could enjoy a cup of tea or coffee.

I have given some thought into making soy milk, but all the recipes I found were labour intensive and made litres of it at a time. However, recently I discovered that I could have been making it in my Thermomix all this time! I discovered that I have the book with recipe in it after browsing a Facebook page that I enjoy, Thermobexta.

The recipe comes from the Thermomix book, A Taste of Asia. I've changed it a little, so I believe I can post the recipe here. It's absolutely delicious. I also use it in my smoothies.


The okara that's left over can be used in vegie Burgers, meat loaf, sausage rolls etc.

Soy Milk

100g organic Soy Beans, soaked overnight in filtered water with either lemon juice or whey added
400g boiling filtered water

Add drained beans and water to TM bowl and blend on speed 8 for 1 minute.

600g water
2 tsp vanilla extract
1 Tbsp maple syrup (or 1 Medjool date, de-seeded)
pinch salt

Scrape down and add remaining ingredients and cook for 10 minutes on 90, speed 2-3. Skim foam from the top.
Cook a further 2 minutes on 100, speed 2. Keep an eye on it to make sure it doesn't boil over.
Cool to about 60.
Strain through muslin or a nut bag into a glass bottle. Refrigerate.

Keeps for about 4 days.

Wednesday, October 9, 2013

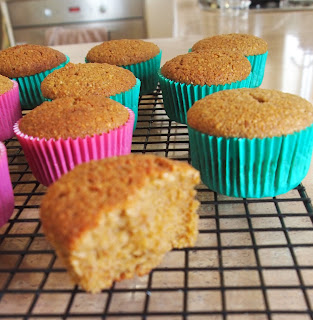
Spiced Banana Pecan Muffins

I've been going through my massive collection of cake and biscuit recipes and adapting the ones I love to make them much healthier.
By healthier, I mean no refined sugars and less reliance on white wheat flour. Not too difficult at all, really.

My latest baking effort today is a delicious muffin, using a couple of those lovely little bananas we've been getting in the shops lately. They were the last of a large bunch and were only really good for cooking.

Annoyingly, this quantity made 7 muffins. I have two 6 hole silicon muffin trays. Next time, I'd make 1 1/2 times the quantity to at least get 10 muffins.


Spiced Banana Pecan Muffins

150g white spelt flour
50g wholemeal flour (or spelt if wanting wheat free)
1 ½ tsp baking powder
½ tsp bicarb soda
1 tsp cinnamon
1 tsp mixed spice
60g melted butter
½ cup coconut sugar
½ cup plain yoghurt
2 small ripe bananas
2 eggs
1/4 cup chopped pecans

Topping
¼ cup rapadura 
½ cup pecans
½ tsp cinnamon
½ tsp mixed spice

Preheat oven to 200C. Line deep muffin tins with fancy schmancy muffin papers (this is so you can use the paper to remove them from the tin when cooked. If you turn them out, the topping comes off!)
Blend topping ingredients in food processor or TMX until crumbled. Set saide.
Place flours, raising agents and spices into processor, sifter or TMX and blend together. Set aside.
Melt butter in microwave or in TMX on 60 for 1 minute, speed 2. Allow to cool a little.
Add bananas and sugar to melted butter and blend together. Add yoghurt and eggs and blend until smooth. 
Stir in flour mixture, blend on speed 3 using spatula to assist or blend in processor in short bursts until mixed. Stir in pecans with a spatula.
Pour into muffin papers and sprinkle with topping. Bake for 15 to 20 minutes or until they spring back when gently pressed. Place on wire rack to cool.
Split in half and butter, sprinkle with golden icing sugar to serve. 

Friday, October 4, 2013

Does fat make you fat?


My answer would be yes and no.

My recent research into fats in our diet has shown up a number of misconceptions, many of which are perpetuated by organisations such as The Heart Foundation and Nutrition Australia. These 'facts' are then transposed down the line by nutritionists, then journalists and they turn up in our magazines, online articles and newspapers. Basically, these organisations are saying that eating fat contributes to heart disease and obesity.

Advice such as 'cut the fat off your meat', buy low fat yoghurt', 'use low fat milk' etc leads people to believe that all fat is bad for you.
Has this fat phobia made a difference to the general population's health? Not as far as I can see. People are still overweight and sick. Diseases such as diet related diabetes are rampant.
In an article from Raisin-Hell (Is the Heart Foundation's Advice Killing us?), the following information should make us think:

The AusDiab (Australian Diabetes, Obesity and Lifestyle) study has been monitoring the health of a random selection of 11,000 Australian adults since 2000. The results of the 12 year follow-up were published this week. (mid-August 2013)
The update shows that the number of us with Type II Diabetes has increased by 41%; that obesity has increased by 22%; that almost half of us now have chronically high blood pressure (this is despite a 30% increase in the use of medication to control it); and that the average 25 year old gained 7 kg on the scales and 7 cm round the waist; all in just over a decade.

So what is the solution? All my research tells me that we must consume fat in our diet. Fats provide energy and are vital as building blocks for cell membranes and for hormones and hormone like substances. Simplified, cholesterol comes from (mostly animal) fat. Cholesterol is a type of sterol, sterols are hormones.
Fat soluble vitamins such as A, D, E and K are only made available to the body by a process that uses dietary fats.

Sally Fallon, in her book, "Nourishing Traditions. The Cookbook that Challenges Politically Correct Nutrition and the Diet Dictocrats" (I know, it's a great title!) discusses a theory that began to be espoused around the 1950's known as the 'lipid (lipid = fancy name for fat/oil) hyphothesis'. The theory, developed by researcher Ancel Keys, stated that there was a direct link between the amount of saturated fat and cholesterol in the diet and the incidence of coronary heart disease.
Fallon comments that since this research was first published, there have been numerous subsequent researchers that pointed out the flaws in his data and conclusions. But it was all too late. The vegetable oil and food processing industries promoted this original theory since they would be beneficiaries of the move away from competing traditional foods.

Fallon also discusses Nathan Pritikin's low fat diet craze. Those who managed to stick to it for any length of time suffered from a variety of health problems with many suffering depression and experiencing vitamin and mineral deficiencies. The other complication, believe it or not, was weight gain!!
Pritikin himself commited suicide when he realised his low fat diet could not cure him of leukaemia.

The Heart Foundation in Australia endorses a low fat diet, encouraging the use of margarine instead of butter, polyunsaturated vegetable oil instead of saturated animal fats and low fat everything. Yet, the Heart Foundation tick applies to many highly processed sugary empty calorie foods (eg. Milo Cereal with 27% refined sugar) seen in the supermarkets today.
In fact, during my research, I've come across a petition from wellness practitioners asking the Heart Foundation to stop promoting these sugar laden high calorie cereals. Find the article here. An excerpt from the webpage petition says the following:

 "Honestly it just seems absolutely ridiculous that a health authority like the Heart Foundation whom many of the public trust and listen to, advise to eat a diet made up of mostly processed carbohydrates in the form of cereal, bread and pasta, consume margarine and toxic oils, processed sugar filled foods filled with additives, preservatives, colours and flavours and which are devoid of essential nutrients and products that contain aspartame. How can they honestly say that this will protect people against cardiovascular disease?"

The article goes on to state that researchers, nutritionists and authors have all come to the conclusion that eating fats from natural healthy sources such as grass feed animals, free range eggs etc will actually contribute to protecting against heart disease.
Sally Fallon, Dr Sandra Cabot, Mary Enig and Cyndi O'Meara are amongst these authors and researchers. These are my go to authors when I want to find out the facts about nutrition.

Here's a link to an excellent article written by Mary Enig and Sally Fallon on the Weston A Price (a dentist and nutrition researcher) Foundation website: The Skinny on Fats

The 'yes' part of my answer to the question on whether eating fat makes you fat, comes about from eating the wrong sort of fats coupled with the way in which the fats are presented. For example, if you eat deep fried sugary doughnuts regularly, then yes, you will gain weight, from the trans fats in the hydrogenated vegetable oil used for frying and the sugar contained in the doughnuts!
If you eat a lot of highly processed foods with added fat, then yes, you will get fat.

But, if your diet consists of wholefoods, including whole eggs, full fat dairy products, free range red meat with a little fat, free range pork with some of the fat, free range chicken with the skin and you use monounsaturated oils such as olive, avocado or macadamia in your dressing, butter on your vegetables and coconut oil, duck fat, lard, butter and tallow for cooking, then, no, you shouldn't get fat. You will find that you won't consume such large portions as you will feel fuller and more satisfied with a diet rich in good fats in combination with whole fruits, vegetables and whole grains and legumes (prepared correctly).
In contrast to a low fat (usually highly processed and high sugar) diet, you will be much healthier and have great skin and hair.

If you're still with me after all that reading, congratulations! Will you be changing the way you look at fats?
Please leave a comment below, I'm interested to hear your views.

Wednesday, October 2, 2013

Pineapple Upside Down Mini Cakes


Okay, this may not be the healthiest of desserts, but now and then we need to have a treat! My version is certainly healthier than most, as it has rapadura and coconut sugars and uses spelt flour. You could substitute white spelt flour for wholemeal to make it even better for you.
I also use pineapple in juice, instead of syrup, to reduce the sugar content further.

I made this in the Thermomix, but a regular mixer is fine. You'll need to use the stove for the caramel.


Pineapple Upside Down Cakes
The recipe was originally designed for a muffin tin that has a wide base. Since I didn't have one, I used 4 mini springform tins instead.

Cake Batter:
2 eggs
100g rapadura 
70g butter
140g spelt flour
1 tsp baking powder
1/4 tsp salt

Topping:
60g butter
80g coconut sugar
3/4 can pineapple rings in juice
8 glace cherries (use maraschino if you have them)


Preheat oven to 180 C. Grease tins lightly.

In a small sauce pan, melt the butter and add the sugar. Stir over low heat constantly and allow to boil lightly while continuing to stir until it comes together. It will take a while, but you will be rewarded with a delicious dark and gooey caramel. 


Spoon a layer of the warm caramel mixture into each tin. Top with a ring of pineapple with 2 cherries in the middle.


Beat softened butter and sugar, add eggs one at a time and continue to beat until sugar is dissolved. Add sifted flour, baking powder and salt. Stir to mix.
If using mini springform tins, place on a tray in case of leakage. Pour mixture over pineapple to about ¾ way up the tins. 


Bake 20 - 25 minutes. Turn out upside down to reveal the delicious pineapple and caramel.


Tuesday, October 1, 2013

Healthy Raw Chocolate


Here's a great video tutorial from the wonderful Cyndi O'Meara showing how to make healthy homemade chocolate in the Thermomix.

This chocolate is very dark, very rich and very delicious! You do only need a small amount to satisfy that chocolate craving.

I made raw chocolate recently, following Cyndi's recipe as I happened to have purchased her cacao wafers a while ago. My mould was a large Milky Way soap mould which worked really well, making lovely thin slices of chocolate. Testers at our Paramount College Wholefood Cooking Class recently gave it the thumbs up.

If you don't have Cyndi's wafers, you can use 80g cacao powder and 250g raw cocoa butter. I buy edible cocoa butter from Aussie Soap Supplies in button form, so very easy to use. If you don't have a Thermomix, I feel very sorry for you........no, not really. You can make it in a double boiler with a lot of stirring.

Once you've cut your chocolate into portions, place in a container in the fridge.

Raw Cacao has four times the antioxidant flavenoids of regular cocoa, as well as magnesium, an important electrolyte and energy mineral. Cacao is also a good source of sulfur which is associated with strong nails, shiny hair and a healthy liver and pancreas.  Other minerals include calcium, zinc, iron, copper and mangeneseCocoa beans also contain a number of B vitamins plus vitamins C and E.

Regular chocolate contains processed white sugar which depletes the body of these vital minerals and vitamins. Using rapadura sugar means that the vitamins and minerals are bioavailable to the body. Making your own chocolate means you can control the amount of sweetening. You may like to try honey or maple syrup instead of rapadura. These may be a little harder to incorporate as they are both water based, and chocolate is oil based.

The essential fatty acids (oleic, stearic and palmitic) found in the cocoa butter component of chocolate may help raise High Density Lipoprotein cholesterol and lower Low Density Lipoprotein cholesterol.

Three forms of protein are found in the cocoa bean - arginine, glutamine and leucine. Leucine is an essential amino acid that cannot be made by the body and must be obtained from foods.

Raw cacao contains theobromine which helps to stimulate the central nervous system, relaxing smooth muscles, dilating blood vessels and giving the body a boost of energy.
Need more convincing? "Bliss" chemicals found in cacao help to increase circulation and availability of serotonin, improving mood and combating depression.

Just don't overdo it!


Sunday, September 22, 2013

Healthy Fast Food

Is there such a thing?

In your own home, yes. From a Fast Food place? No, I don't believe so.

In undertaking a little research for the wholefood unit that I'm taking as a part of my Nutritional Medicine course I found a great website called the Healthy Home Economist. Sarah, an American woman writes about the dangers of processed foods in our diet. She has posted a great video showing how to teach your children at a very young age not to ever want to eat fast food. She basically purchases a Happy Meal from the drive through at McDonalds, then gives her child the toy from the box. She then tells the child that the rest of what is in the box isn't food, and will make them very sick if they eat it. She removes the burger and drink from the box and places it in the rubbish bin, reinforcing the fact that the contents of the box belong in the bin, not in their stomachs.
This can be done from as young as 18 months, she says, and is a very powerful lesson. After all, the child only wants the Happy Meal for the toy inside, as the McMonster marketing gurus know. So, buy them the toy, but throw the burger away.
A very interesting way to teach children the value of fast food.
Here's the link to the video: Mom vs Fast Food

So many people tell me they only have Maccas and KFC and HJ's occasionally, when they go to Perth or Albany, for example. The more I learn about the rubbish that's churned out from these fast food joints, the more I wish I had never, ever allowed my children to put any of it past their precious lips.
However, it's too late now, they all love it. Not so much Maccas or KFC, but HJ's is a definite favourite. Though, my daughter is more keen on Wok In A Box and those sort of chain fast food places now. So much healthier and nicer!

When I was a child, our favourite take away food was Fish and Chips. This was a Friday night special treat and Dad would have to go down the street to buy it because it was Mum's night off from cooking. The fish and chips of my childhood is nothing like what most fish and chip shops serve now. The chips were hand cut and cooked in beef fat, a healthy, high smoke point stable fat. The fish was coated in a light and crispy batter and also fried in beef fat. There were no additives, stabilisers, preservatives or artificial colourings. It was just plain food. Still high in fat, but a once a week treat.


Sunday, September 1, 2013

Healthy Wheat Free Waffles

This recipe is based on Quirky Jo's Blender Batter Waffles. I substituted the brown rice for a blend of different flours. My recipe isn't totally gluten free, due to the barley and rolled oats, but it is dairy free.


The batter also makes great pancakes. We had these waffles for breakfast in the morning with butter and fresh strawberries, then dessert the following night with ice cream and berries or Maple Berry Sauce.
If you're looking to cut your fat intake, serve with yoghurt (add a touch of honey and vanilla) and berries.

As Jo says, you can swap out anything for the brown rice as long as the total amount is around 250g.
It's a blender batter because instead of adding almond milk, you make the almond milk with the batter. It's important to make the batter at least 8 hours before using as the starches are best soaked to help aid digestion by breaking down phytic acid.

If having for breakfast, start the night before, for dessert, start in the morning.

Blender Batter Waffles or Pancakes

250g brown rice (I used 35g amaranth, 65g buckwheat, 70g rolled oats and 80g pearl barley)
30g raw almonds (or raw cashews)
300g water
1 tsp apple cider vinegar
30g macadamia or coconut oil
1 tsp pure vanilla extract

Add rice to Thermomix or food processor and blitz on speed 9 for 1 minute or so until fine. Add water, ACV, oil and vanilla and blend for 30 seconds on speed 9.
Cover and leave overnight to stand at room temperature. Or place in a glass bowl, cover and leave on the bench overnight.
When ready to cook, reblend for 1 minute on speed 9.

Add:
1 large egg (optional)
Blend for a minute on speed 9. Preheat waffle iron and add raising agents and blend again for a few seconds:

2 tsp baking powder
1/2 tsp bi carb soda
1/2 tsp fine sea salt

Bake until crispy or use to make pancakes. Serve with butter or cream and maple syrup or with ice cream and berries.

Maple Berry Sauce
1 cup frozen berries (I like blueberries)
1 - 2 Tbsp of maple syrup

Place in saucepan and simmer gently until blueberries are totally defrosted and syrup thickens a little.
Enjoy!

Megan
p.s. I've made these a number of times with different seeds and grains and they're always fantastic. I can't recommend this recipe enough, it's foolproof! My husband loves them.

Wednesday, August 28, 2013

Thermomix Decals

If you're tired of the way your Thermomix looks on your kitchen bench, why not dress it up? Many people name their Thermomix kitchen machines, mine's simply Thermie. But giving it a new look? How can you do that?

Easy! Go to http://www.thermostyle.com.au/ and check out the gorgeous decals. Aussie made, so your money stays in Australia.

This is my favourite:


Orange and Almond Cakes

These little morsels are so delicious and light. I'm quite surprised as I thought the almond meal would make them heavy.

I have adapted a recipe found on taste.com to such an extent that I'm calling it my own. The cakes are not gluten free, but are wheat free and high fibre, low GI. I used coconut sugar, but rapidura would work just as well.  These were made in the Thermomix, but an ordinary mixer or food processor would work just as well.

200g raw almonds (or 200g almond meal)
150g butter, melted and cooled
2 eggs
1 orange
100g coconut sugar (2/3 cup)
1/2 cup white spelt flour
1/2 cup wholemeal spelt flour
1 1/2 tsp baking powder
1/2 tsp bi-carb soda

Preheat oven to 175 C. Place muffin cases in 2 x 1/2 cup muffin trays to make 12. I use silicone trays.
Grind almonds in Thermomix or processor until fine. Remove from bowl and set aside.
Place melted butter, eggs and finely grated rind and juice of orange into TM bowl. Blend on speed 4 - 5 for 20 seconds.
Add coconut sugar and blend on speed 2 for 1 minute. This helps dissolve the sugar as it has quite large crystals.
Add flours, rising agents and almond meal to mixture and blend on speed 3 for a few seconds. Scrape down and mix again on speed 4 to 5 until combined. Divide among the muffin cases, filling to top of the cases if muffin tray is deep.
Bake for around 25 to 30 minutes or until the top of a muffin bounces back when pressed lightly.

Serve dusted with icing sugar. Delicious when eaten warm (I had to try one!)

Monday, August 19, 2013

Magic Bean Chocolate Cake

This recipe originates from a Thermomix consultant at www.recipecommunity.com.au  and is delicious and moist as well as being gluten free! It can be made dairy free using oil instead of butter, but the texture will be different.
This is a Thermomix recipe but can easily be made in a food processor.
I've made a few changes such as reducing the sugar content. I'd like to try it with maple syrup or agave next time.

Magic Bean Chocolate Cake

Pre heat oven to 180C
Grease a ring tin (I used a silicone one)

420g can red kidney beans, drained and rinsed
1 Tbsp coffee (2 tsp coffee powder in a Tbsp hot water)
2 tsp vanilla extract or paste
125g softened butter
130g raw castor sugar
5 eggs (large)
70g good quality cocoa
1 tsp GF baking powder
1/2 tsp bi-carb soda
pinch salt

Place kidney beans, coffee, 2 eggs and vanilla into TM or processor and blend until smooth. Remove and set aside. (If you have two TM bowls, it makes it easier!)
Beat butter and sugar on speed 5 for 1 minute or so, scraping down occasionally. Add 2 eggs and beat again for a minute.

Add bean mixture with last egg and remaining ingredients and beat on speed 4 to 5, scraping down until mixture is homogenous.
Pour into tin and bake for around 30 - 40 minutes or until a skewer comes out clean.

Buttercream Icing
Jude Blereau

125g softened unsalted butter
450g (2 cups) golden icing sugar (made from raw sugar)
60ml milk
2 tsp vanilla
2 - 3 Tbsp cocoa powder
Beat until smooth. Use a knife moistened in warm water to spread.

Sunday, July 21, 2013

Healthy Homemade Burgers

Talking to a friend recently about meal planning and thinking of interesting meals to have each night. She commented that Friday night is burger night and Sunday night is fish and chip night.
I thought that was a great idea, so have adapted it to my eating style. 

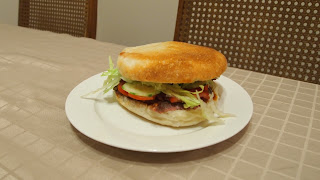
We have burgers on one day of the weekend and fish with healthy chips another day. Tonight is burger night and I've made delicious flat hamburger rolls from the recipe I've posted previously, but swapped out half the white bread flour for wholemeal spelt. I added some chia seeds and a sprinkling of rolled oats to the mixture.The water content needs to be raised to 380g to 390g.


Chicken Burgers are on the menu, so I've devised a healthy Chicken Schnitzel by borrowing a recipe from my daughter. She was inspired by her nanna, my husband's mum to bake her Chicken Schnitzel as my Mother in Law baked everything, even steak!

First of all, you will need to make a batch of KFC spice mix, another wonderful recipe from forumthermomix.com. 
Add 1 heaped Tbsp of the spice mix to 1/2 cup or so of flour of your choice into a bowl. I use brown rice flour or wholemeal spelt. In another bowl pour in some buttermilk or yoghurt. In the last bowl, pour in some cornflake crumbs or rice crumbs. I just whizz up some cornflakes in the Thermomix to make the crumbs.

For two people, one chicken breast is enough. Heat oven to 220 degrees C and place a lined tray in to heat.
Slice in half horizontally to make two thin pieces. Coat in the seasoned flour, then buttermilk, then cornflake crumbs. Coat thickly with the crumbs. Set aside in the fridge until oven is hot enough.

Spray the tray with cooking spray and place chicken on the tray, spraying again. Cook for 20 to 25 minutes, depending on thickness.


Put your burger together with your favourite fillings. I like tomato, onion, avocado and lettuce with low fat dijonnaise. 
No photo because I devoured it!

Megan

Thursday, July 11, 2013

Super Sprout, Super Foods

I just have to share these amazing products with you, my readers. I'm always looking for ways to incorporate more fruit and vegetables into our diet. It's not always easy when the local store only had fresh fruit and veg fresh in once a week. I do envy those with access to fresh produce markets.


A bit of googling came up with this wonderful website: www.supersprout.com.au where powdered whole fruits, vegetables and sprouts can be purchase online. I ordered beetroot powder, strawberry powder and wheatgrass powder, thinking I could add some to my shakes. I also ordered the recipe book.

My products arrived today and I'm impressed. The beetroot powder is dark and gorgeous and tastes delicious as does the strawberry powder. I've not tried the wheatgrass yet, but will add it to my shake tomorrow morning. I also received a complimentary sample of ginger powder and broccoli sprout powder with a little pamphlet outlining information about the products.

The recipe book is lovely with some great ideas on using the powders. I look forward to experimenting on the weekend!
(I have not been paid to endorse these products)

Megan

Sunday, July 7, 2013

Not a Skinny Dip

Skinny doesn't always mean skinny when it comes to buying pre packaged foods. Browsing the supermarket for a bought dip recently, knowing I may not have time to make one, I was studying the calorie content of two packs of Hommus.
One was Black Swan Skinny Hommus, the other, Willow Farm Hommus. One would think the skinny one would have less calories, but it was not the case!
Here's the evidence:


The Black Swan Skinny Hommus is on the left. It has 826kJ per 100g. The regular Hommus on the right contains only 711kJ Don't pay any attention to the 'per serve' information as the serving size differs with each product. Always look at the per 100g quantity.

The sugar content is lower in the regular Hommus, making it a better choice.
Better still, make your own:

Easy Hommus
1 x 425g can chickpeas, drained and rinsed
1/4 cup lemon juice
1/4 cup tahini
one clove garlic
2 Tbsp EVOO
1/2 tsp ground cumin
salt to taste
black pepper
Extra EVOO and paprika to serve

Blend lemon juice and tahini for about one minute. Scrape down and process for another 30 seconds.
Add garlic, EVOO, cumin and seasonings. Blend for 30 seconds, scrape and blend for a further 30 seconds.
Add half the chickpeas and blend for one minute. Add the remaining chickpeas and blend for one to two minutes until smooth. Test for seasoning and adjust if necessary.
Place in a bowl and swirl around. Add a little EVOO in the swirls, then sprinkle with paprika.

Note:
The blending and scraping down creates a creamier texture. You can just through everything in the processor or Thermomix and blitz for three minutes.

Friday, June 21, 2013

Belly Fat

Belly Fat, that annoying spare tyre, muffin top or whatever euphemism one would like to use, it's one of the most frustrating areas to try and fix.

An interesting article in the latest Australian Healthy Food Magazine gives an outline about how dangerous belly fat actually can be to our health. But what are the causes?
According the article, written by Stephanie Osfield, there are a number of reasons why fat can accumulate around the middle.


Hormones, simply overeating, alcohol, menopause, not enough sleep and stress. What's really interesting are the effects that this benign muffin top or beer belly can have on our bodies.

"Belly fat is often a sign of fat hiding in the abdomen," according to Tim Crowe, Associate Professor of Nutrition at Deakin University.
This is known as visceral fat and it can accumulate around organs such as the kidneys and heart. It's actually metabolically active, which means it pumps hormones and inflammatory chemicals  into the body. In women, this can lead to excess oestrogen which can lead to fertility issues, and I'm sure problems with menopause too.
Those chemicals and hormones are linked to conditions such as asthma, diabetes, arthritis and heart disease. How can that happen? It's just a bit of a spare tyre, isn't it?

For example, visceral fat continually releases excess fatty acids directly into the bloodstream. These then are processed by the liver and cause an increase in the production of other fats such as the 'bad' cholesterol, LDL. As if that isn't bad enough, the chemicals released by this visceral fat can prevent glucose from moving around the body and instead keeps it in the bloodstream causing levels to rise. So, the body tried to get rid of it by producing more insulin. This excess insulin in turn causes the insulin receptors to shut down and you get insulin resistance - bango wango - you're looking at Type 2 Diabetes.

Other health risks include dementia, osteoporosis, migraines and breast cancer.

BUT! There is good news! Nutrition and exercise...fancy that! Yes, as soon as you cut back those calories, the visceral fat is the first to go. As far as exercising, you don't need to do crunches, weights or sit ups by the dozen. In fact, a nice little tidbit I read in the magazine stated that:

"The marketers of the heavily advertised Ab Circle Pro exercise machine were fined $25 million in the US for deceptive advertising."

A little simple cardio will help. Anything that makes you breathless - climbing stairs, power walking, swimming, dancing and aerobics.

By following the the 80/20 idea (80% nutrition/20% exercise), visceral fat will reduce substantially along with that annoying spare tyre!
I know I've gone down a few notches in my belt.

Wednesday, June 12, 2013

iPad/Tablet Stand


For those of you, like me, who use their iPads or other tablets to access recipes, being able to use your iPad in an upright position is so much easier.

I've bought a stand, but it's not much chop. The iPad still falls over. So, I'm going to get myself one of these super, duper Kribbits!

Rather than spend forever typing up all the information about them, I'm copying and pasting from Helene's Super Kitchen Machine website. I'm in partnership with Helene and sell these products through my blog. The price includes delivery from Canada to Australia.

Finally -- the best iPad stand for cooks and kitchens!  
The KRIBBITT iPad stand is a universal tablet holder that fits all devices (including the iPad mini and other brands from 14cm). Click to see video.
SIX reasons why this is the best iPad stand for kitchens: 
  • fits so many devices, not limited to one model of iPad or brand of tablet
  • fits so many places! ideal in the home and outdoors: at the beach, poolside, on boats, airplanes, schools, hospitals & practically everywhere else. Easy on/off, switch between devices and family members easily
  • easily adjust to multiple viewing angles to reduce eye fatigue & muscle strain
  • even works with 'smart cover' on(Just fold the cover back and set your tablet into the Kribbitt.)
(I like this bit, as the stand I have now does not allow for my smart cover)

  • easily adjusts for landscape and portrait 
  • hangs securely from standard door pulls found on most upper kitchen cabinets. Very stable and not permanent, easily removes in seconds if you need to open the door. (No screws or drilling! Click here to see how it works.)
What else makes this iPad stand special and different from the rest? 
  • latex-free rubber for secure non-slip placement even when scrolling and typing
  • lightly grips thigh for stability when seated, remains balanced on uneven surfaces when lounging
  • choose your fave colour: blackgreenpink, frosty/clear.
  • provides a comfortable handle for ease of presentations, shooting video, taking pictures, moving between rooms 
  • light, compact & durable:  take it anywhere
  • customize to your preference, and adjust as often as you like... there is no single way to use the Kribbitt, it's all up to you!
  • child friendly: soft but strong rubber cushions the tablet if knocked over by a moving pet or rough play
  • KRIBBITT is made by hand in Canada (by a dad who invented it for his kids). 
All kit prices include world-wide airmail shipping
Great in the house, car, and outdoors, this revolutionary iPad holder will quickly become your best buddy in the kitchen.
Just click the graphic at the top right hand side of my page to go to the online store for this fantastic product!!

Megan

Saturday, June 8, 2013

Flat Hamburger Buns & Vegemite Scrolls


When I have a burger, I don't want it to be all bun, I like to load up the fillings. I love those flat, round buns that you can sometimes get from the supermarkets, but most often from chain bakeries such as Baker's Delight. But, I've always wanted to make them myself.

I have a brilliant recipe for bread rolls from forumthermomix.com called Bread Rolls in Under an Hour. And, you certainly can make them in that time, but I do prefer a longer prove time. The rolls are gorgeous and soft inside and there's a recipe for a lovely crunchy topping.

I won't reprint the recipe here as the link will take you to it. I prove in my Thermomix bowl for about an hour or so until it's almost popping out of the top. Once shaped, I allow them to double in size, another hour or so.

To make the burger buns, simply cut the dough into 8 pieces, as per the recipe and put two aside. Make the 6 pieces into a round shape and stretch out as much as possible to flatten. Place onto a large baking tray that is lined with baking paper or a silicone mat, leaving room for spreading. Place a piece of baking paper or a lightweight silicone mat over the top of the rolls.

With the remaining two pieces, join them together and roll out into a rectangle shape. This will require some patience as the dough will want to spring back to it's original shape. Persevere.


Mix some Vegemite with butter and spread over the dough. Add some grated cheese and roll into a log. Cut into 1cm pieces and place on another lined tray that will fit over the rolls.
Cover with a cloth and allow to prove until doubled.
In the last 10 minutes of proving, preheat the oven to 225 degrees C.

Bake as is on the top shelf of the oven for 15 minutes. Remove top tray and place on a shelf underneath for a further 5 minutes.
Remove scrolls and allow to cool a little before placing on a rack. Check that rolls are cooked by tapping the base of one. Remove to a rack to cool completely.

Makes a fantastic steakburger

Hamburger Bun the next day ready for the toaster
   
Cut in half to reveal a lovely fine texture and soft interior.

NAILED IT!

Megan

Friday, June 7, 2013

Leftover Almond Meal


If you're making your own almond milk from the recipe on my blog, then you'll have leftover meal from your DIY efforts. This isn't strictly almond meal as a lot of the goodness has been extracted. But, you can make almond flour. Almond flour is gluten free, high in nutrients, low carb and very expensive to buy.

As you make your milk, put the pulp aside until you have a reasonable amount. It's probably a good idea to freeze it while you're building up the quantity.

Place it onto a baking tray and into a very low oven, 50 - 60 degrees C. Leave it for around three hours until it's completely dry. Place into a food processor, blender or Thermomix and blitz until fine. Place into a glass jar.

Here's a link to some recipes using almond flour: http://www.elanaspantry.com/almond-flour-recipes/
If you google almond flour recipes, you'll come up with loads.

Thursday, June 6, 2013

Easy Almond Milk

Almond Milk is a perfect addition to the morning Herbalife shake and it's so easy to make. This is my own recipe and can be made in a food processor, blender or the ultimate machine, Thermomix.

I have read where it's advisable to soak the almonds in hot water overnight to 'release the goodness', but I rarely remember to do that. If you do, that's great.


Boil the kettle first - use filtered water where possible. Place 60 - 100g raw almonds into machine. Add 1 teaspoon coconut oil, a splash of maple syrup (optional) and a dash of pure vanilla extract. Add 960g (about 1 litre) hot (not boiling*) water from the kettle and whizz for one minute.

While it's whizzing, prepare your strainer. Simply a piece of muslin, a wire strainer and a large jug. Place the muslin into the strainer and over the jug. Pour the liquid into the muslin. If you have a small strainer just do a bit at a time. Allow to drain and help with a spoon. Gather the muslin into a ball in your hand and squeeze out carefully until all liquid has been extracted. Refrigerate in a glass bottle. Use within three days.

Makes around a litre.
*If you use boiling water, the nuts will cook and absorb the water. Make sure it's no hotter than 60 degrees.

Check out this blog post to see what to do with the leftover almond meal.

Monday, May 20, 2013

Weight Loss Time

Yep, winter is a notorious time for putting weight on. All those delicious warm desserts with custard and cream, the luscious thick and creamy soups and freshly baked buttery rolls. I love to bake bread and winter time is ideal with the oven warming the kitchen and the inviting aroma filling the house.

So, I've decided it's also the perfect time this year to start a weight loss program. I've tried being mindful of what I eat in the past, but find all that I do all day is think of food. It's just too damn hard trying to reduce food intake and count calories without a little bit of help.
In the past, I've poohooed these sorts of programs, but I do think I have enough knowledge of nutrition to manage a commercial weight loss program sensibly.

Research of the various weight loss companies led me to Herbalife. Herbalife sounds like it's a bit of a rort, an MLM company that is hitting those most vulnerable in the hip pocket. Well, that's what I thought, at first. But, after some google research, I've found that the positive reviews of the program far outnumber the negative. The negative reviews have come from those who looked at the program from the outside and didn't actually try it.

I began watching my food intake about three days prior to starting on the program while awaiting delivery of my products. I managed to lose about 500g in that time. I knew I wouldn't be able to keep it up, though as I've tried before.

The Herbalife programs are flexible and one can choose the products to suit the desired outcome. Since I want to lose 5 kgs to start with, then a further 2 -3 and maintain that weight, I've gone with only one Shake a day, the Multivitamins and the Herbal Tea. I loathe shakes, so this was a bit of a daunting prospect for me to replace my favourite meal of the day, breakfast, with a shake.

Day two today and I'm coping well. Today, I added one frozen banana and 6 frozen strawberries with a tablespoon of chia seed to the almond milk I made and the shake powder and blended in the Thermomix. I ended up with ice cream, not the best thing to enjoy on a cool winter's morning, but very delicious and filling.
I followed this with a cup of warming Herbal Tea, which I really enjoy.


1kg down and 4 to go before my first goal is reached. Weeks one and two are meant to be easy, then it gets harder, so I expect it to take a couple of months.

Saturday, May 4, 2013

Bread Rolls in Under an Hour

This recipe comes from one of the members from www.forumthermomix.com, where all great Thermomix recipes can be found along with helpful hints.


These rolls can actually be on the table in less than an hour. They are light and fluffy inside with a delicious crusty top, closest to bakery rolls I've ever made. They are slashed with a sharp knife before the second rise. You can see from the photo that I started making a cross shape, then got tired of that and just went with the one cut across the top.

Bread Rolls in Under an Hour
forumthermomix.com

600g bread flour
350g lukewarm water
2 Tbsp oil (I use Rice Bran)
2 tsp Bread Improver
1 tsp salt
2 1/4 tsp dried yeast

Add all the ingredients to the TM bowl and knead for 4 mins.
Allow to rise in the bowl for 10 minutes, MC in place.
Knead for 30 seconds (I forgot this step and it didn't make any difference)

Remove from bowl and place on ThermoMat. Roll into a log shape and cut into 8.
Shape each piece into a roll and place on a baking tray.
Slash tops with a sharp knife and cover tray with a cloth.
Place in a warm spot to prove for 10 minutes. (I left mine for 20 or so in the car)

In a small bowl, mix:

2 tsp rice flour
1 Tbsp milk
2 tsp oil

Brush rolls with the above mix and place into a cold oven set to 220C.
Bake for 25 minutes. Remove to a cooling rack. If planning to use straight away, wrap in a clean tea towel and place in a basket.


Tuesday, April 16, 2013

Thai Sweet Potato Soup

The weather isn't really quite cool enough for soup yet, but I'm tired of the heat and am looking forward to winter food.

Winter is the time where we use the slow cooker that teases all day with it's aromas of something delicious. Or the quick and tasty soups whipped up in no time in the Thermomix.

Tonight's is one of the latter, a fast and delicious soup with flavours from Thailand. Although I'm unable to buy fresh lemongrass, coriander or lime leaves, those essences of Thai food, I have a few tricks up my sleeve.

I always keep those tubes of Gourmet Garden Herb Pastes in my fridge. Basil, Coriander, Chilli, Lemongrass, even Parsley (for when my parsley has gone to seed in the garden) all mean I have my favourite flavours at my fingertips. My other trick is to buy the fresh Kaffir lime leaves when you see them and throw them in the freezer. They freeze dry and you can use them as you would dried bay leaves.

I was planning on making a plain pumpkin soup for tea tonight, but changed my mind when I spied a large sweet potato in the local store and that was it. I made this in the Thermomix. If you don't have a Thermomix, then make it on the stove, but it will take a lot longer and you'll need a stick blender to process it at the end.

Thai Sweet Potato Soup

1 onion, peeled and quartered
a little oil
800g sweet potato, peeled and chopped into large pieces
1 Tbsp coriander paste
1/4 Tsp Chilli Paste (or to taste)
1 Tbsp Lemongrass Paste
2 tsp Basil Paste
1 litre water
2 tsp chicken stock powder
3 Tbsp Fish sauce
two or three Kaffir Lime Leaves
1 small can coconut milk

Place onion into TM bowl and chop a few seconds. speed 5. Add oil and saute for 3 minutes, Varoma, speed 1. Add all the pastes and saute for a further minute on Varoma.
Add sweet potato and saute for 2 minutes, Varoma, speed 1.
Add water, stock powder, sauce and lime leaves and cook 18 minutes, Varoma, speed 1. Place the basket on top to prevent any overflow. Remove lime leaves.
Add coconut milk and place MC on top. Blend by slowly increasing speed up to 8 or 9 for a few seconds, holding MC in place.

Pour into bowls and squirt a dob of Coriander Paste into soup. Swirl with a toothpick or skewer.

Add more water if soup is too thick.

Thursday, April 11, 2013

How to Poach an Egg

Poached Eggs Hollandaise or Florentine has to be my all time favourite breakfasts. I make it at home frequently and it's the breakfast of choice if I'm lucky enough to be eating out.

I've pretty much got the knack of poaching an egg, but sometimes I have disasters, with the egg sticking to the bottom of the pan or just falling to bits.

I recently posted on my Bush Gourmand FaceBook Page a foolproof method for the perfect poached egg. Here's the link if you missed it.Video: How to Poach Eggs

I made poached eggs for breakfast this morning and tried this method and it did work. The eggs I had were from the local store and were very fresh, so not much dripped through the sieve. Using the sieve to roll the eggs into the water worked really well in keeping the egg nice and oval shaped. I did put a bit of vinegar in the water, just to be on the safe side.


 As you can see in the picture, there was very little floating egg white in the pan. I rolled the egg around gently to keep the nice oval shape.


Served with Hollandaise made in the Thermomix, wilted spinach,smoked salmon and homemade bread. Delicious! I won't need lunch now.

Another thing I did learn from the video that I didn't know is that you can poach a number of eggs and place them in a bowl of cold water in the fridge for up to three days!

Here's my Hollandaise recipe. It's made in the Thermomix, but you can make it with a stick blender. It won't be quite as light and fluffy.

Hollandaise Sauce

2 egg yolks
1 tsp dijon mustard
juice of half to one lemon, depending how tangy you like it.
90g butter
white pepper

Place butterfly on blade and add yolks, mustard and juice to bowl. Blend on speed 2 for a few seconds.
Add butter, soft if possible, and programme 3 minutes, 90, speed 3.

Leftovers can be placed in the fridge and heated gently in a ceramic or glass dish over simmering water, stirring constantly. Or, use in place of mayo on a tuna sandwich.

This also makes a great sauce for fish. Add the grated lemon rind too.

Enjoy egg poaching,

Megan